Hi folks, this is Colin. This is the project page for my Q guitar, documenting the transformation of a guitar from a stock low-end guitar, the Epiphone Les Paul Special II to a highly customized and relatively high quality version of the Ovation Ultra GP1, as popularized by Queens of the Stone Age and Kyuss guitarist, Josh Homme.
This is my first real attempt at any kind of guitar modification. I will be learning as I go and making a lot of mistakes along the way. Hopefully documenting the successes and failures of the project via this page will contribute to learning and future successful projects, both for me and for others. I large portion of this project is refinishing, for which I'm treating reranch.com as my bible. There are some excellent resources there, particularly reranch 101 and the solid colors section.
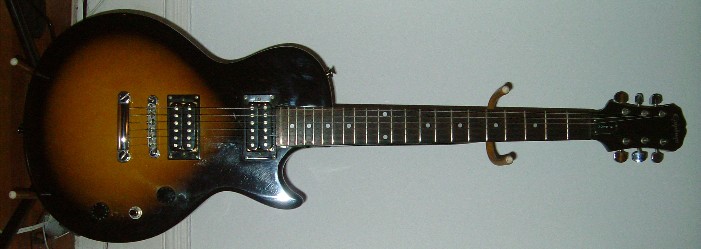
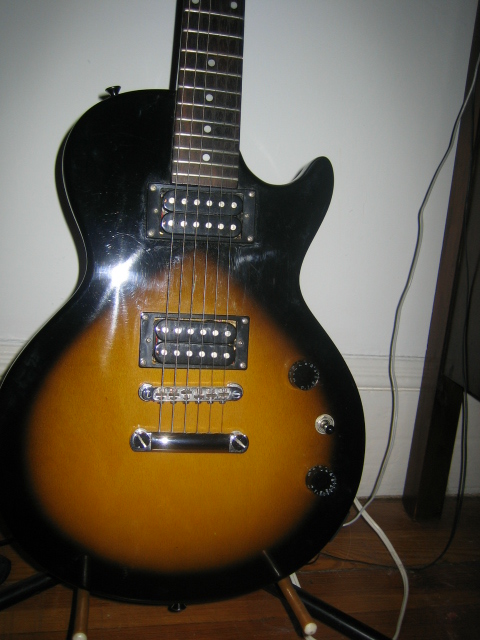
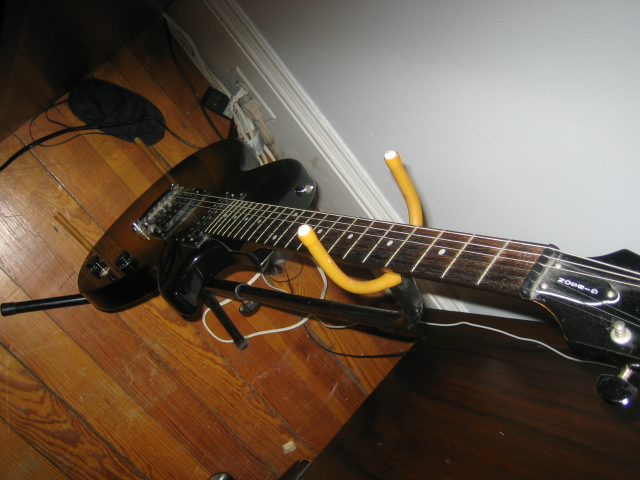
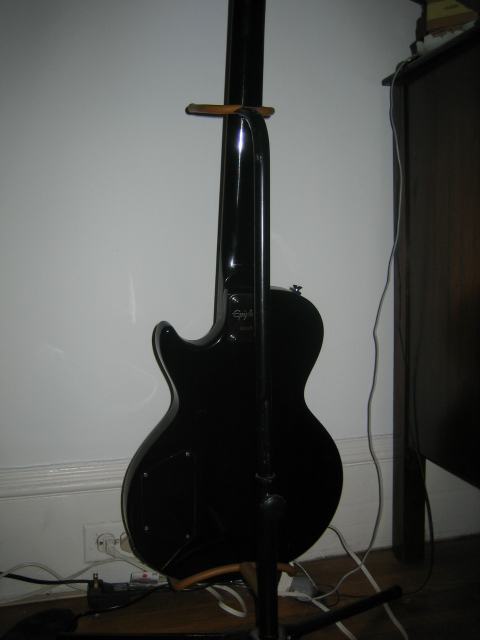
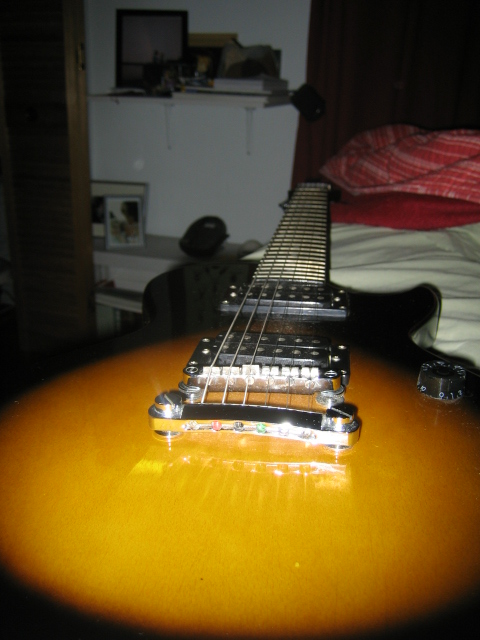
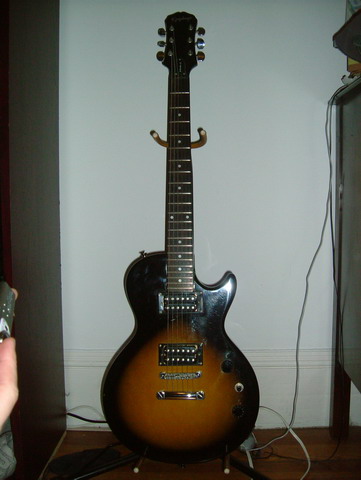
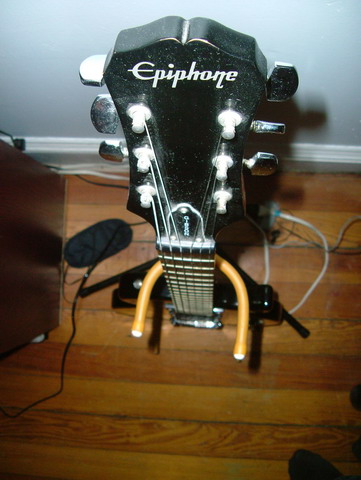
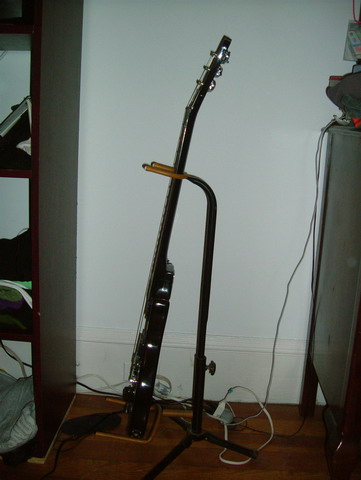
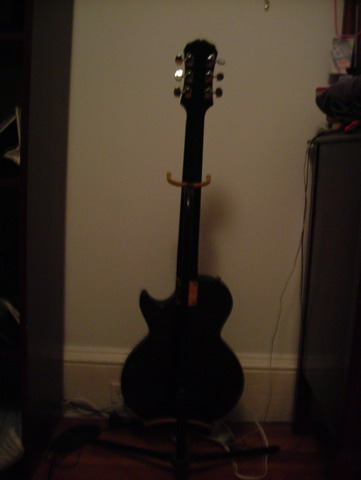
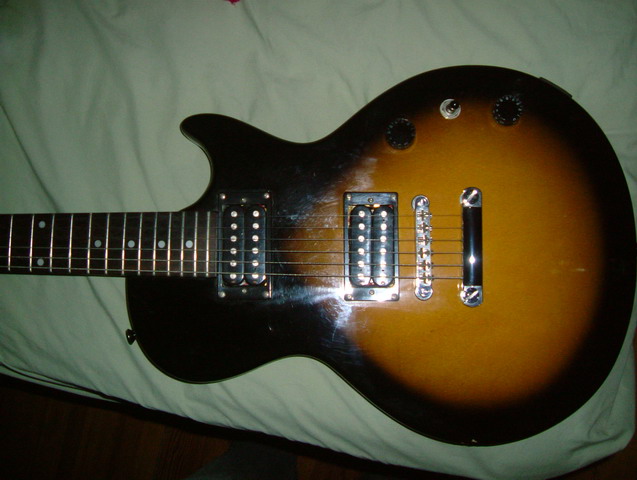
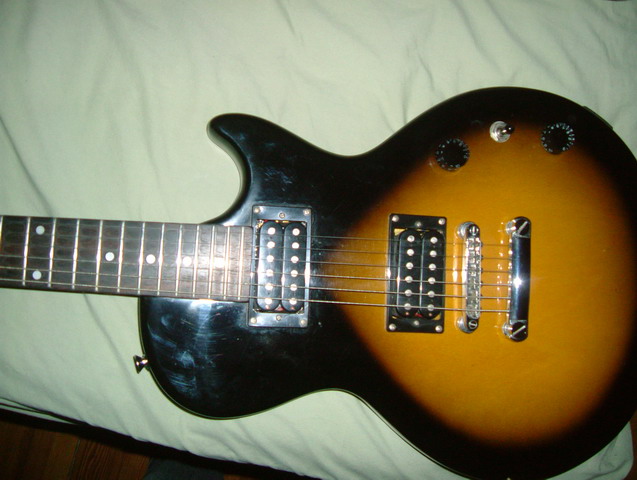
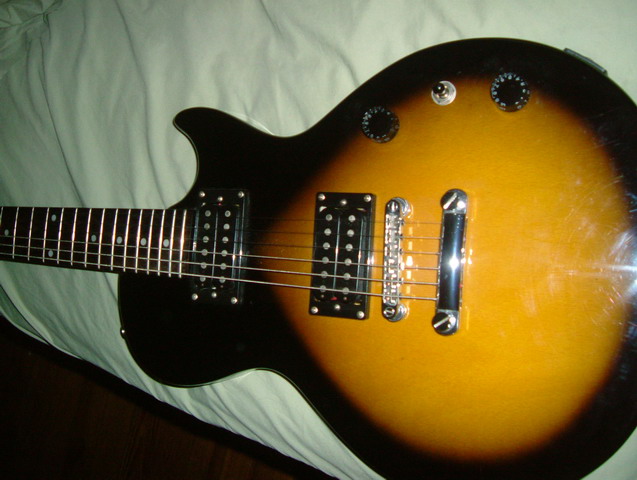
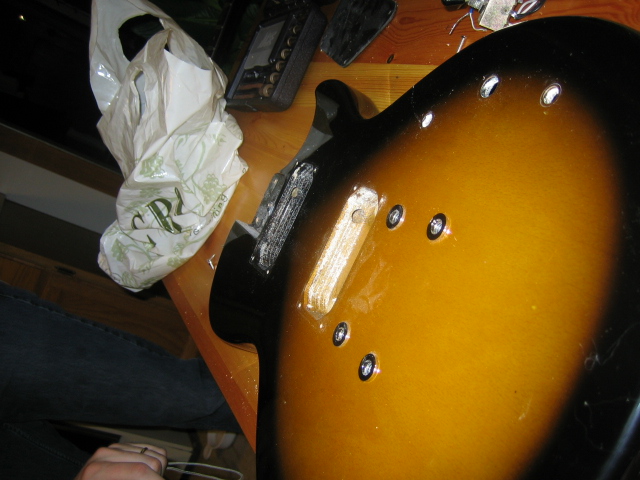
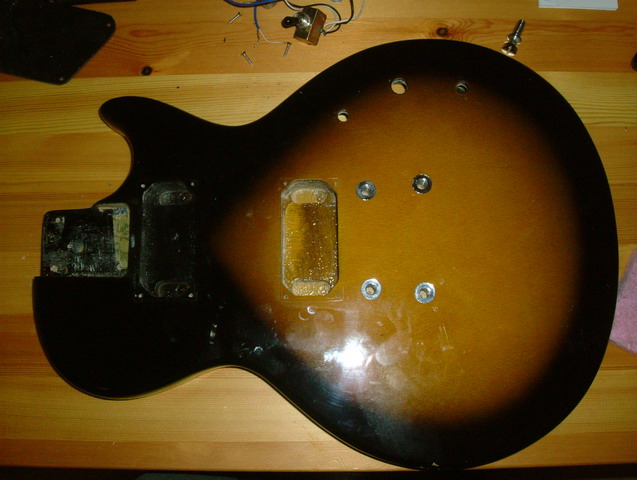
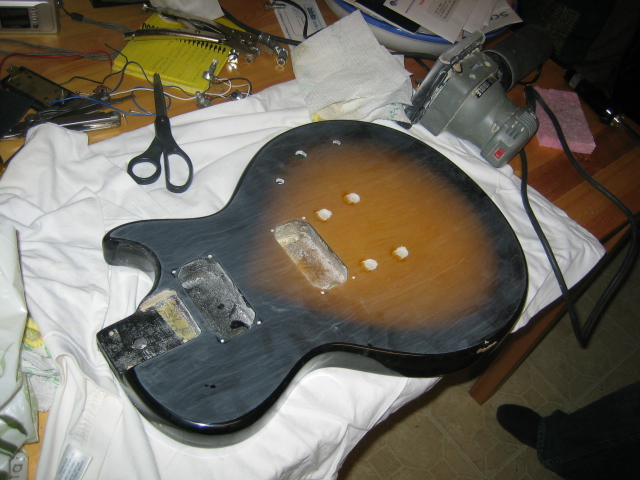
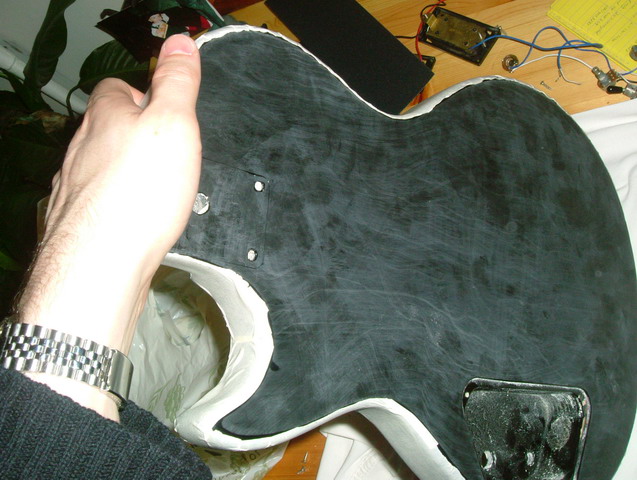
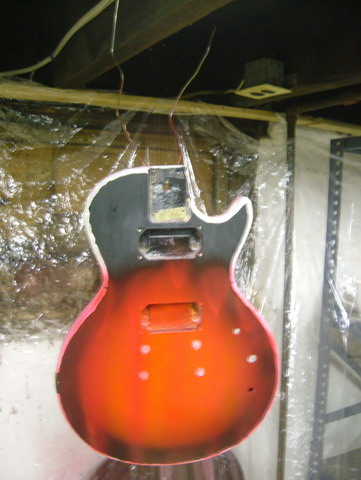
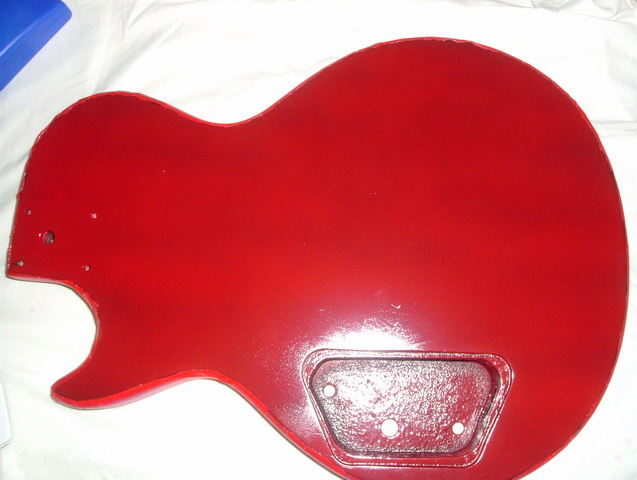
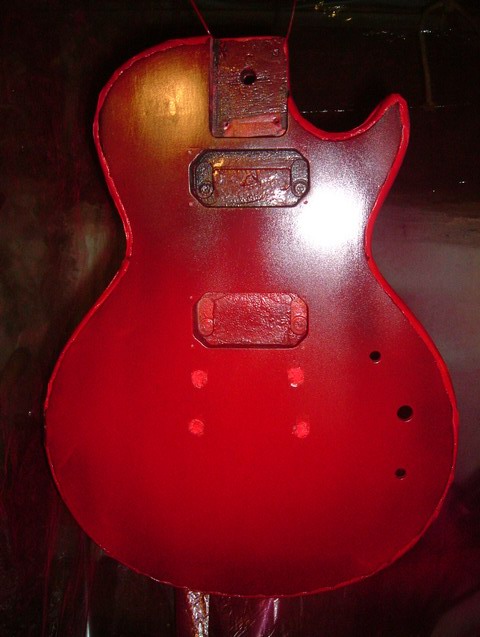
As I mentioned, I'm starting with an Epiphone Les Paul Special II. The guitar was originally purchased new from Guitar Center in around 1996 by my friend Derek for about $200. He moved to Utah in August 2004 and sold me the guitar (and a Fender practice amp) for $50. The guitar has a plywood (laminated alder/maple, according to the Epiphone site) body and a mahogany bolt on neck. The original finish is tabacco burst with clear poly. The stock humbuckers and hardware are all low-end. Here is a photo of the pre-modified guitar.
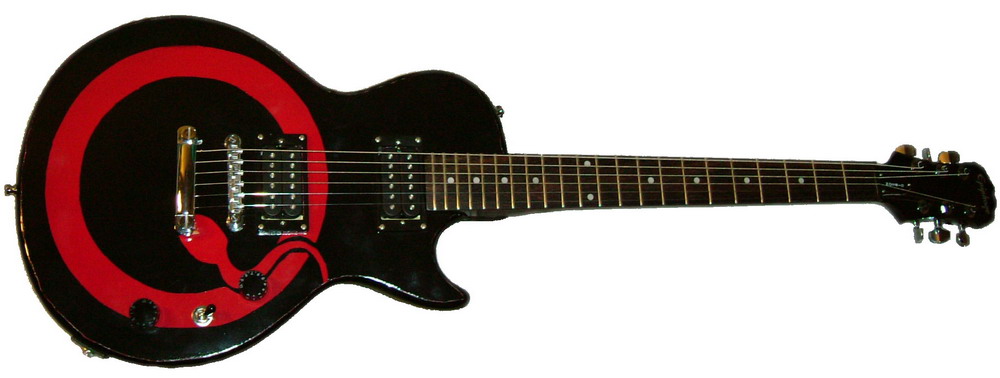
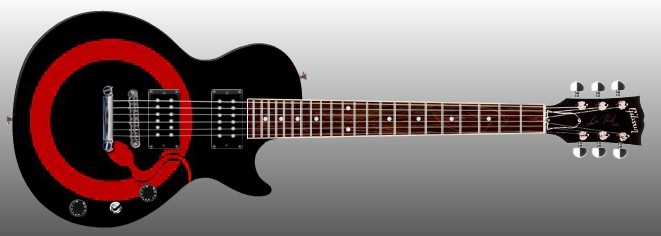
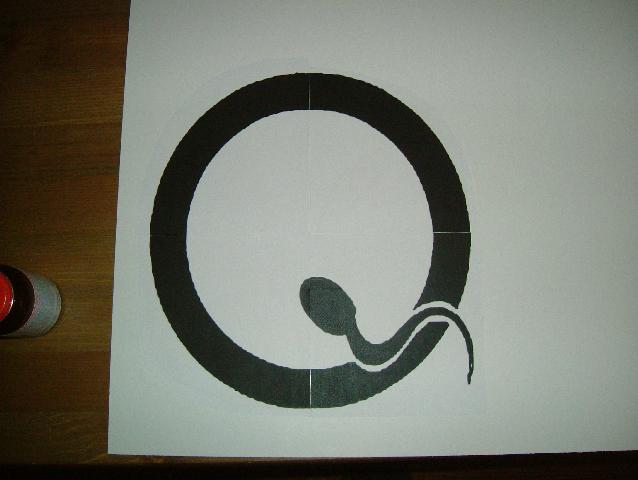
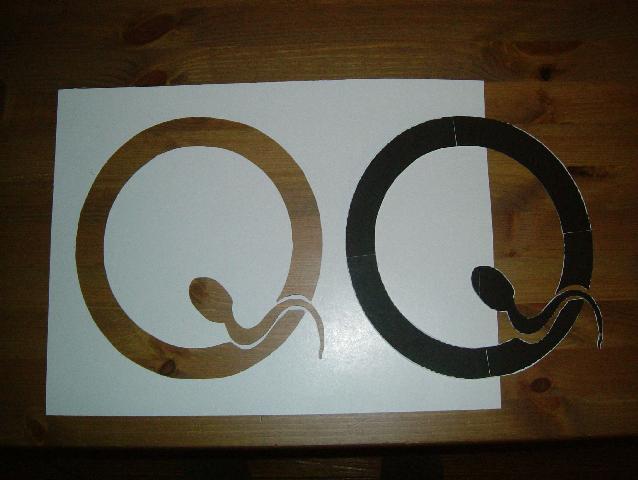
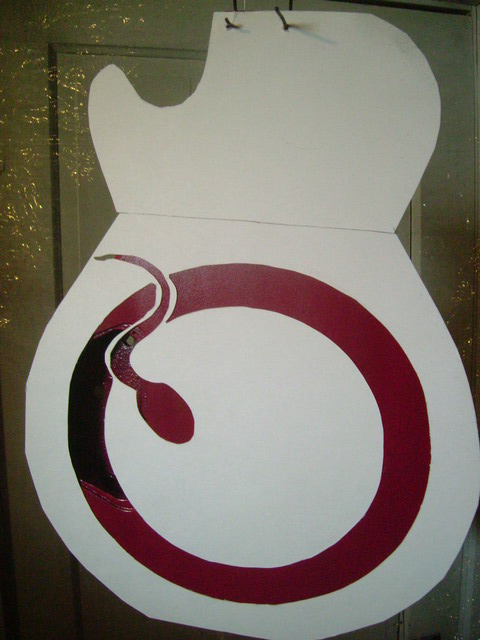
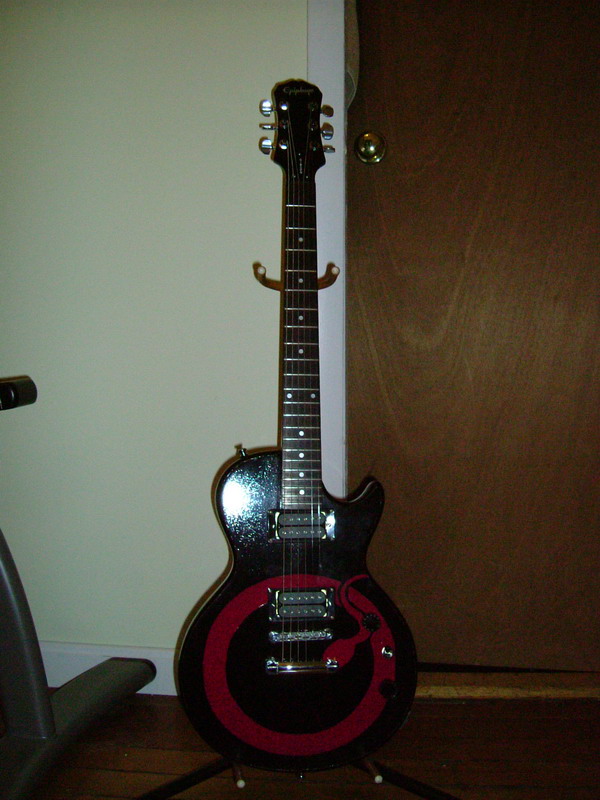
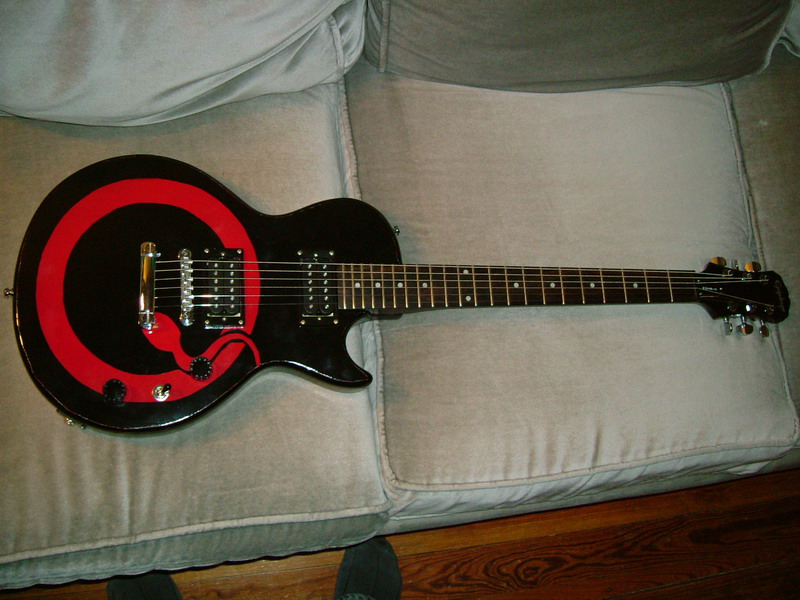
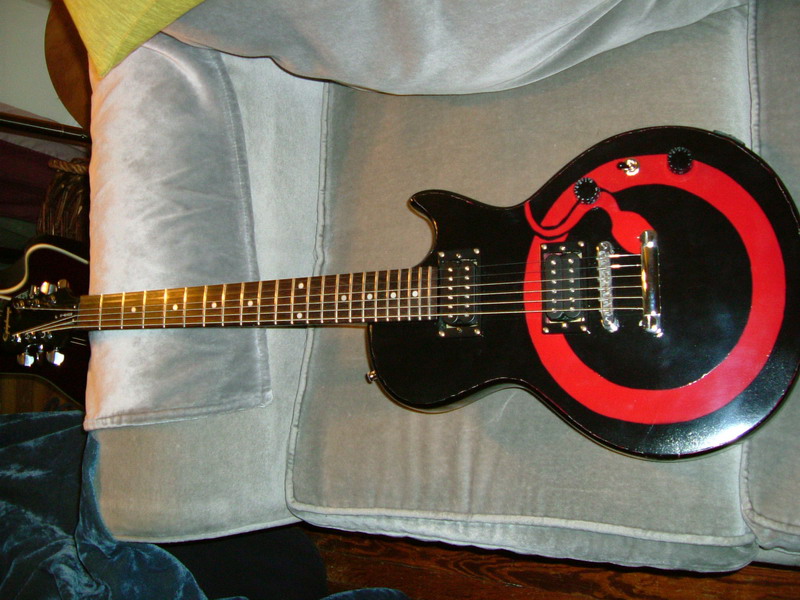
When I purchased the guitar, I decided to modify it and keep it tuned 2 full steps down, C-F-A#-D#-G-C, which is the tuning that is mainly used in Kyuss and Queens of the Stone Age albums. Continuing with that theme, I plan on matching the pickups in Josh's Ovations, which are Dimarzio Super 2's. I really don't like tabacco burst finishes, and I figured if I'm going to go to the effort of a refinish I should make it special, so I decided to go with a 2 color "Q" theme, using the Songs for the Deaf color scheme and Q logo. Here is a mock-up of what the guitar should look like in the end.
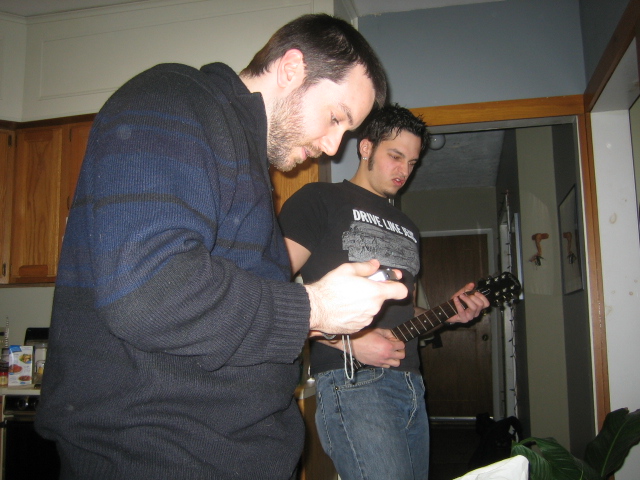
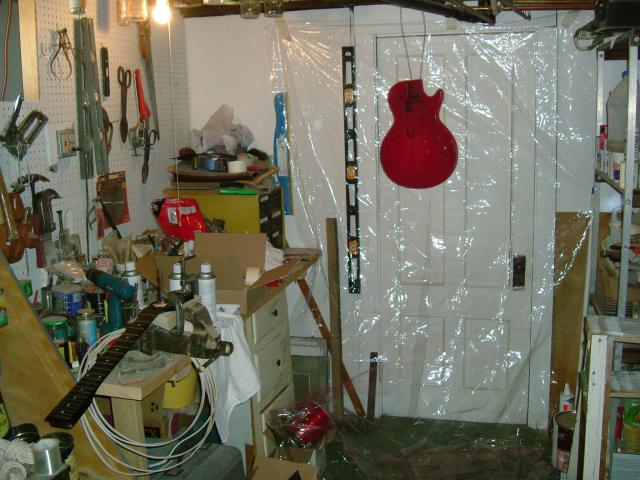
While on Christmas vacation, I ordered some paint from reranch. My package arrived this week. I ordered a can of black, a can of Dakota red (for the Q), and a can of clear nitro satin finish. My friend and guitar-modding addict, mig50, was in town for the weekend, so I figured this was a good time to start. First, we took a bunch of pictures of the guitar.


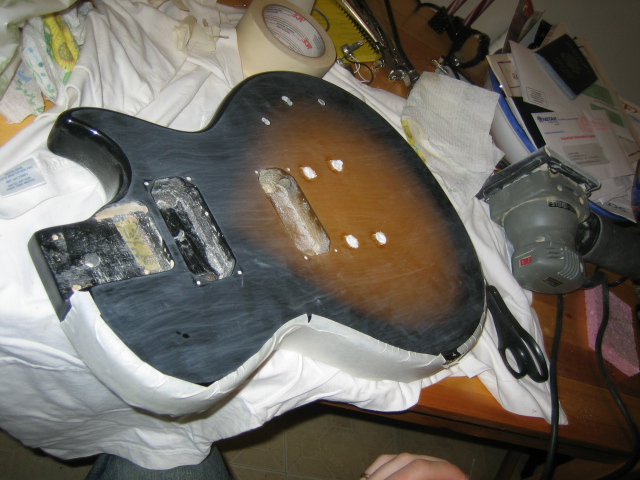
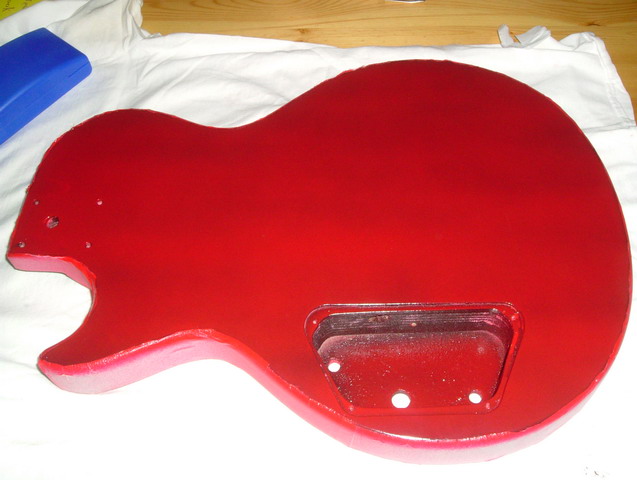
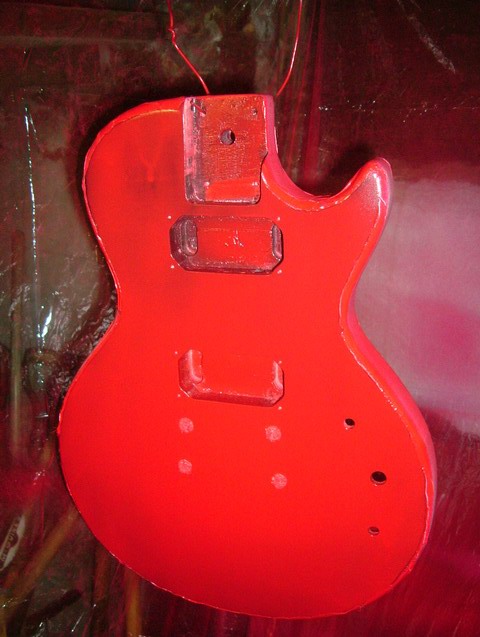
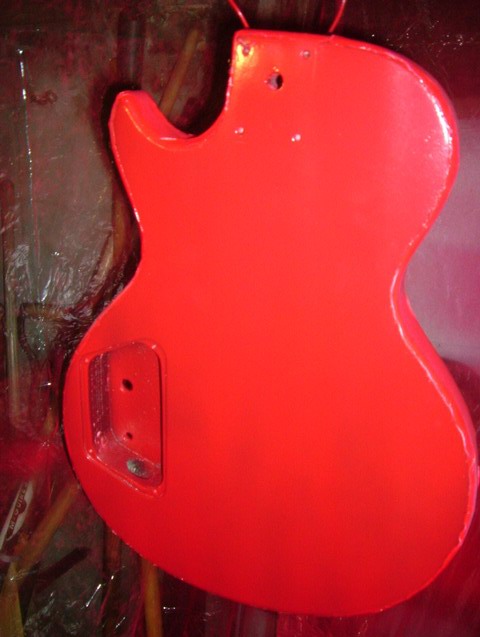
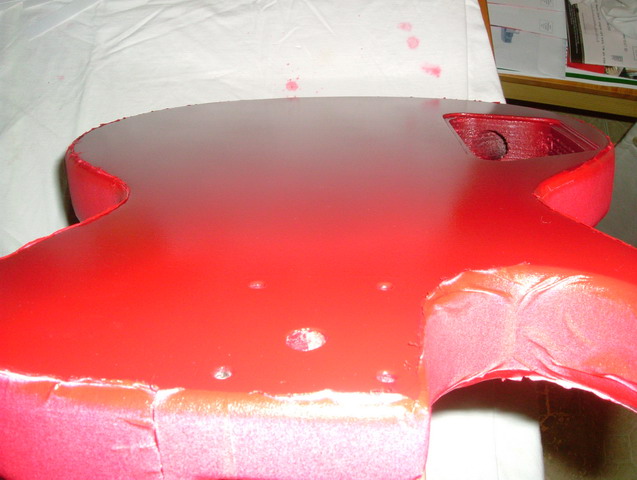
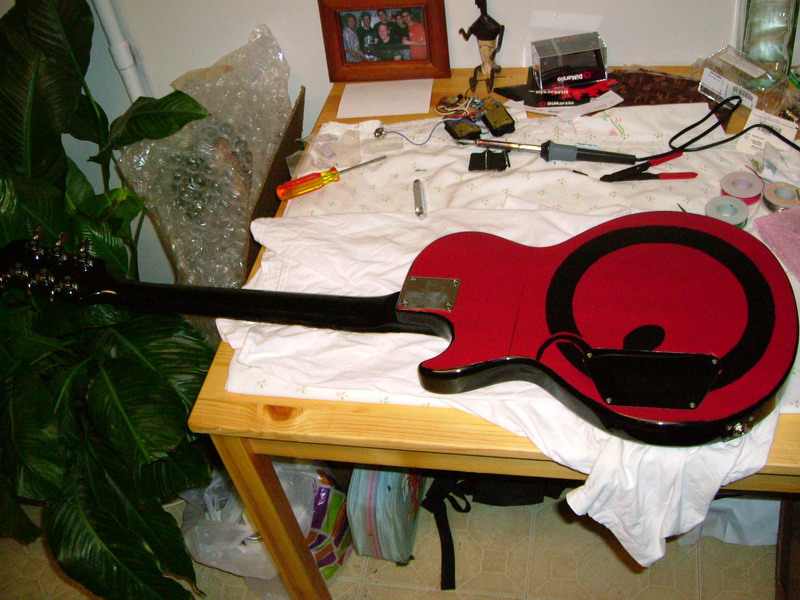
Then we removed the neck and all of the electronics. The bolts that hold the bridge and tail-piece were a real bitch to remove, and we put a few minor dents in the finish around them. By the time we had finished, I discovered that I scratched the finish on the back pretty badly in the process. On a whim, we decided to finish the back as well, going with solid red.


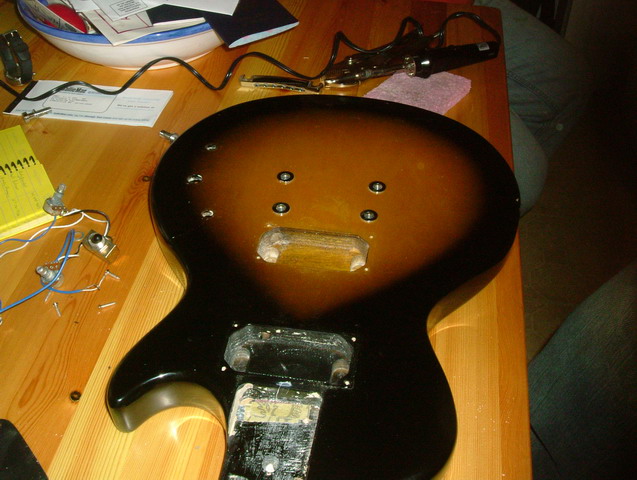
Taking advice from reranch, I sanded the original poly with 220 grit paper. We decided to leave the sides as they are and taped them up. It might look a little funny with glossy poly sides and satin nitro top, but to hell with it.

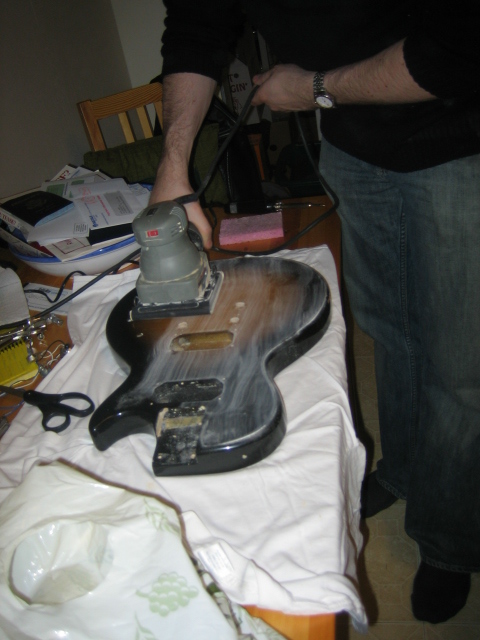


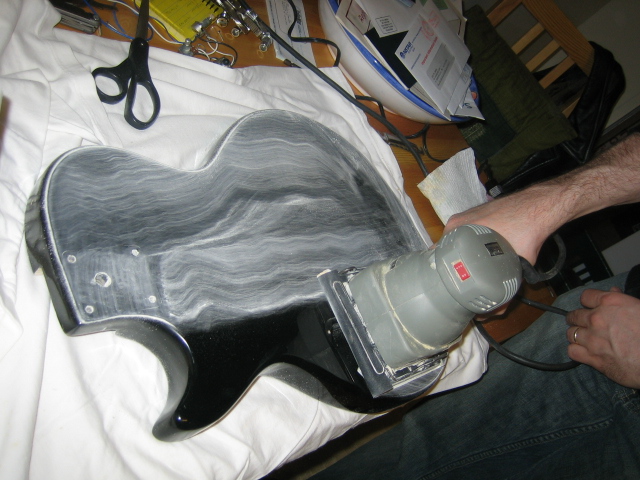


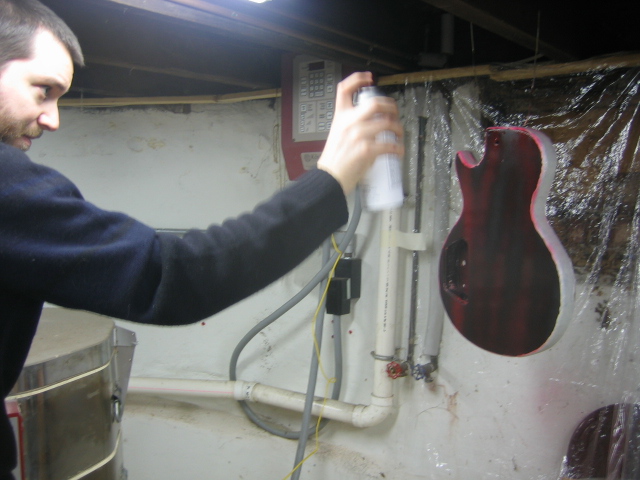
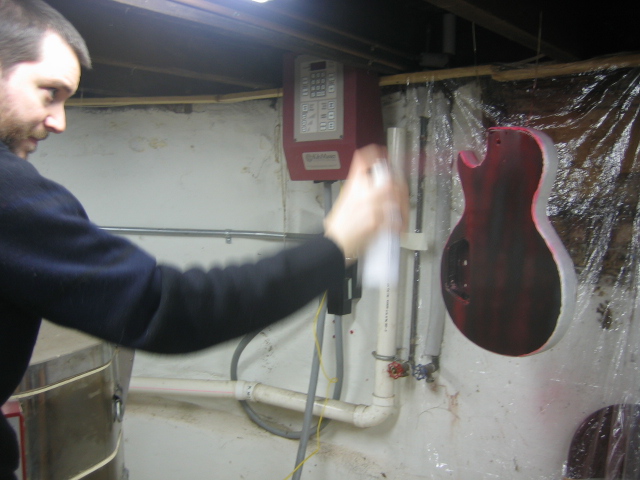
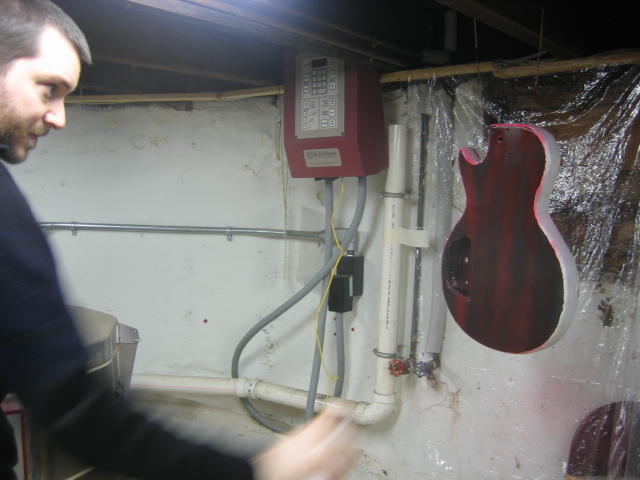
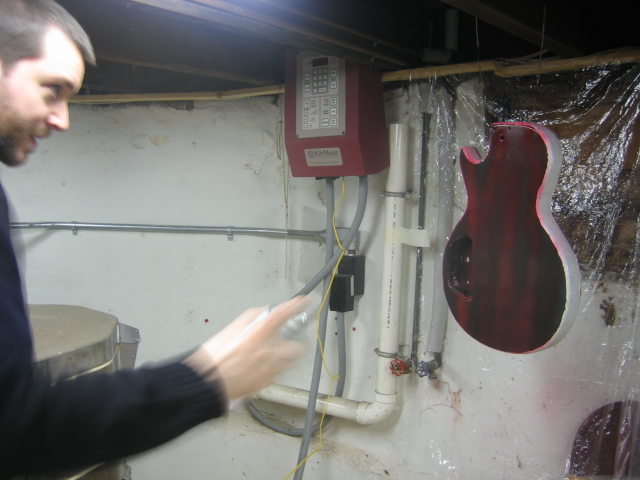
We're now ready to apply some paint. We took the body down to the basement and set up a plastic drop cloth so I didn't get paint all over my landlord's basement and pottery. I was a little tentative on my first coat, and the result is a bit of skunk striping. I'll fix that in subsequent coats. I went the opposite way on the front, getting a little too agressive and producing a number of runs. On Sunday I wet-sanded out the runs with 400 grit and did some more coats.


I got another run in the finish on the front when I sprayed on Sunday night, so I wet-sanded it out as soon as I got home from work on Monday. I was all ready to spray again when my landlords came downstairs and made me move my spot, using a tone of voice that reminded me of Lumberg from Office Space. I really hate our landlords. So I nailed a picture hook into the ceiling on the other side of the basement and it's held so far. I did one coat on each side on Monday.


On Tuesday night I did one more pass on each side. I got a little too excited on the back and sprayed too wet in one spot. I'm debating whether to be a perfectionist about it or not, which would mean sanding it out and doing more coats. Unfortunately the can of red is starting to get light. I may just have to live with it. On Wednesday morning I reread the stuff at reranch and it reminded me that I need to be doing some more sanding soon. I couldn't find any sandpaper finer than #400 at any of the local hardware stores, so I made an order at stewmac.com. While I was there I picked up some polishing compound, some new control pots, a 3-way switch, and some strap locks. Also, in my reranch readings I came across this:
If you are using the Guitar ReRanch aerosols note that the nozzle fan will rotate to give either a horizontal or vertical spray pattern. Choose the pattern that feels best to you. (To avoid spraying yourself be sure to remove the nozzle from the can before rotating the fan).
I was unaware of that, but the can did come with 2 different nozzles. I'll have to check it before I paint again, which could be a while from now due to some new news...
Remember those landlords I hate? Well I hate them more. They are shutting down any spraying in the basement. I have no idea where I'm going to be able to spray or when I'll find a suitable place. I really, really, really want to move. I'm dreaming of Arizona, where $1350 a month buys you your own house with space and weather that's more condusive to painting in a garage. Not that I even have a garage. Right now my only option is to drive to my parent's house to work on it, which is 1.5 hours away. Obviously that will seriously hinder my progress. I believe explitives are in order here: FUCK FUCK FUCK FUCK FUCK FUCK FUCK.
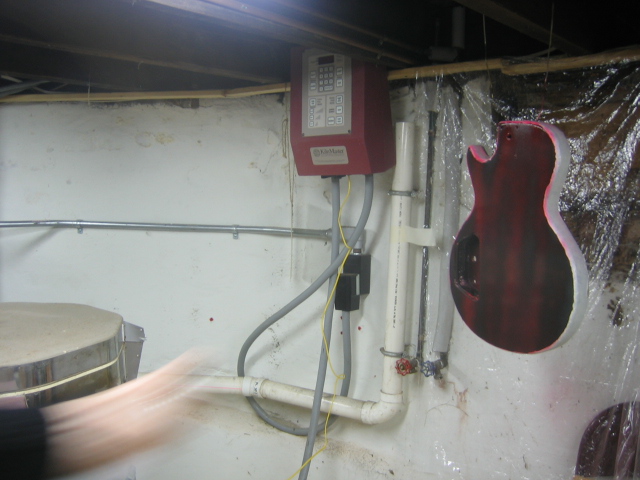
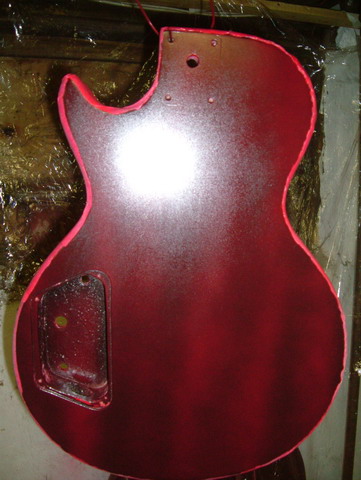
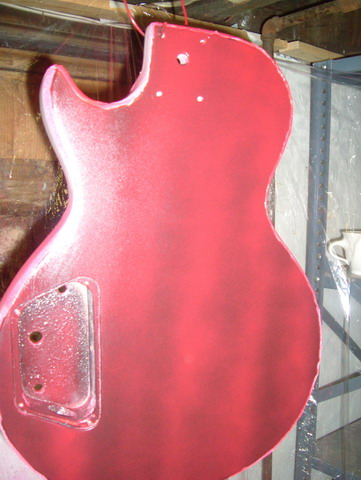
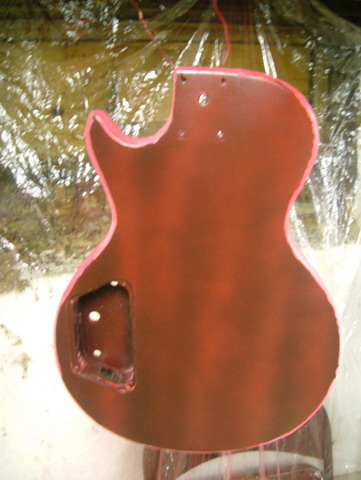
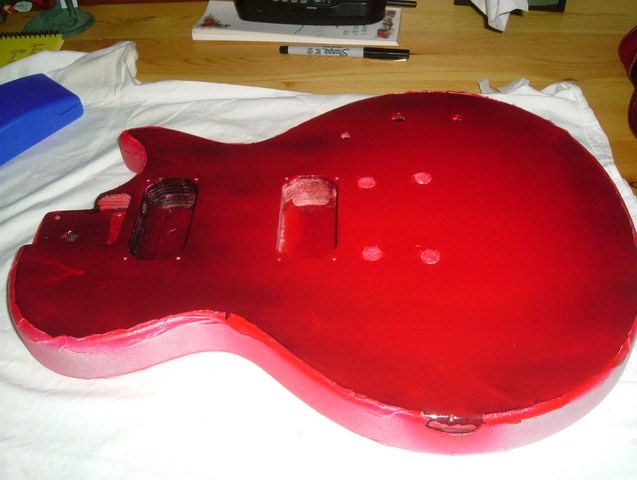
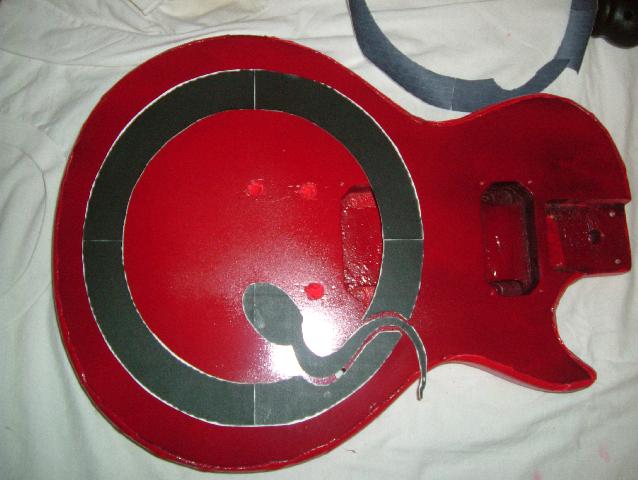
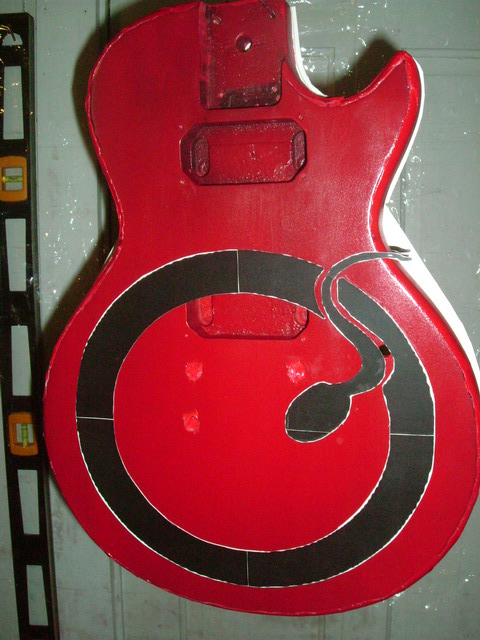
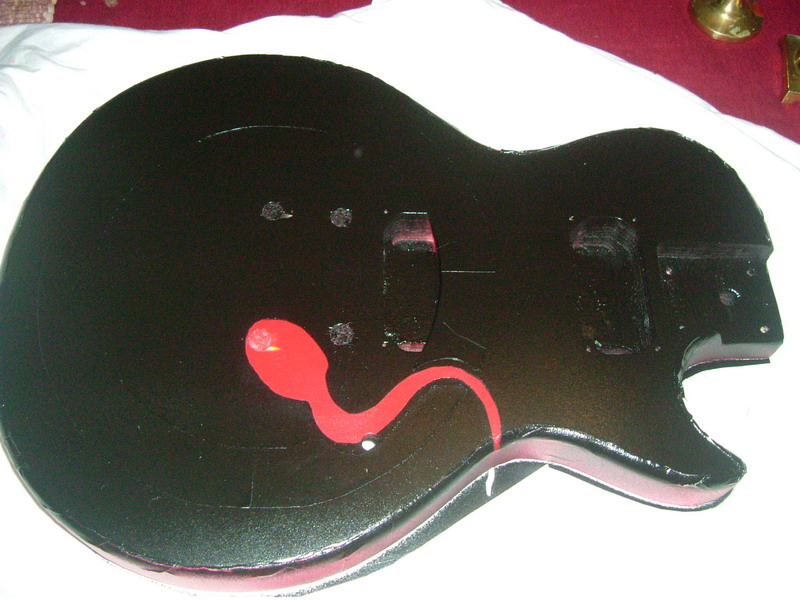
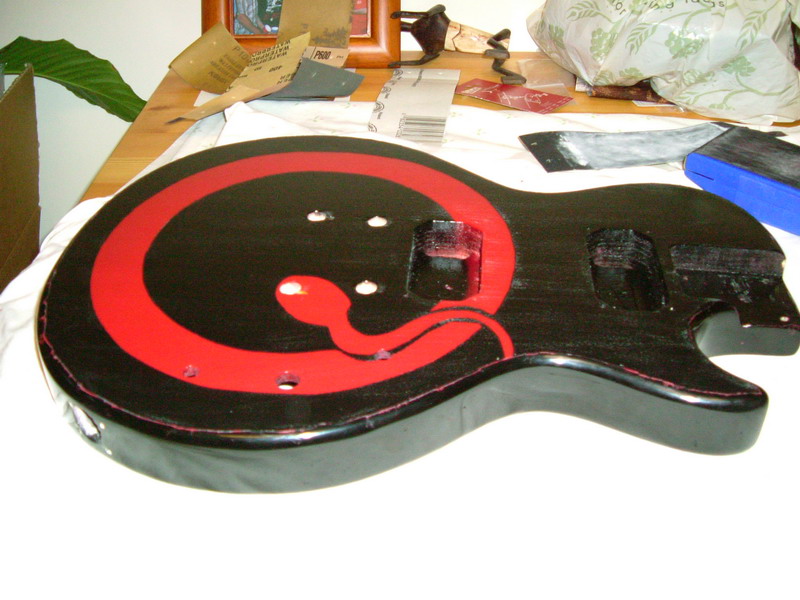
Since I can't paint, I did a trial run of the stencil and took some pictures. The outline version of the stencil was to check to see if the red was good enough where it will actually show on the front. I think I'll sand both sides with #600, then do one final coat of red on each. For the record, the nozzle was turned the wrong way, which is probably at least partially responsible for the number of passes that I've had to take each time (and thus the more paint I've wasted hitting the drop-cloth. The next time I'll be able to paint will probably be not this weekend but the next. Patience.
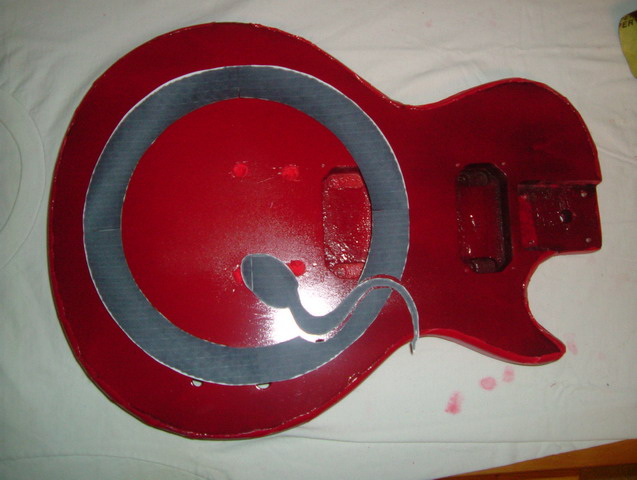

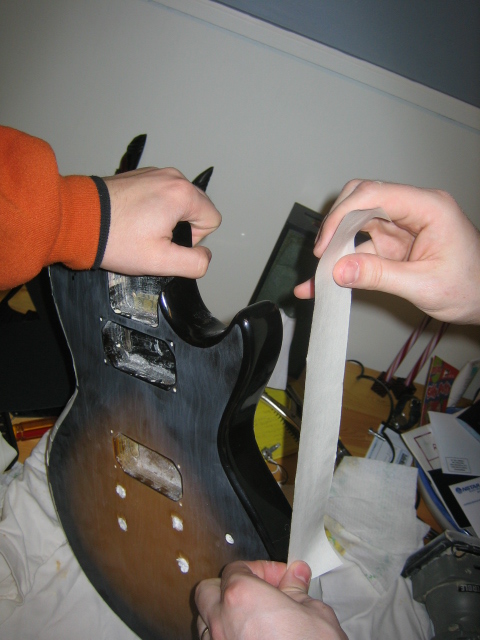
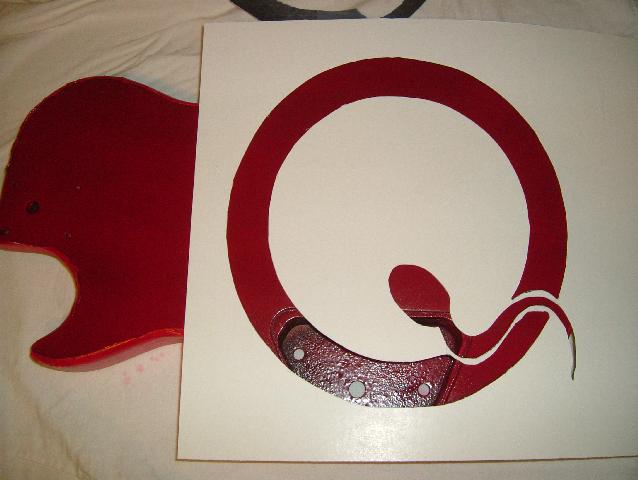
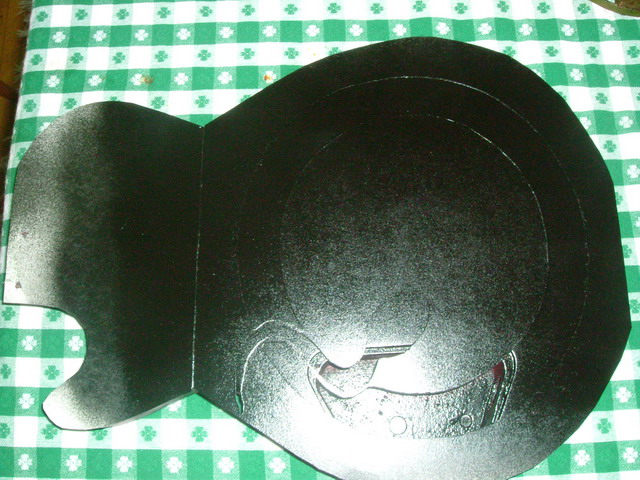
On Sunday I broke out the poster board and made the Q stencil that I will actually use. I think it came out well. I also decided to use the cutaway stencil to place a black Q on the back of the guitar, creating an inverse of the image on the front. I think it will look cool. After I took the picture I decided it should be backwards and thus a true inverse.
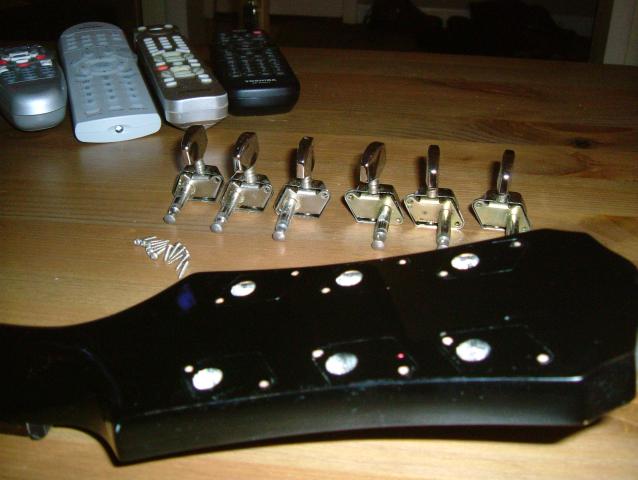
I didn't work on anything throughout the week, mainly because there's not a lot I can do. I did order some new tuning machines (more about those later). I had planned on going to New Hampshire to paint, but The Blizzard of 2005 (TM) dumped 2 feet of snow on the Boston area and kept me at home.
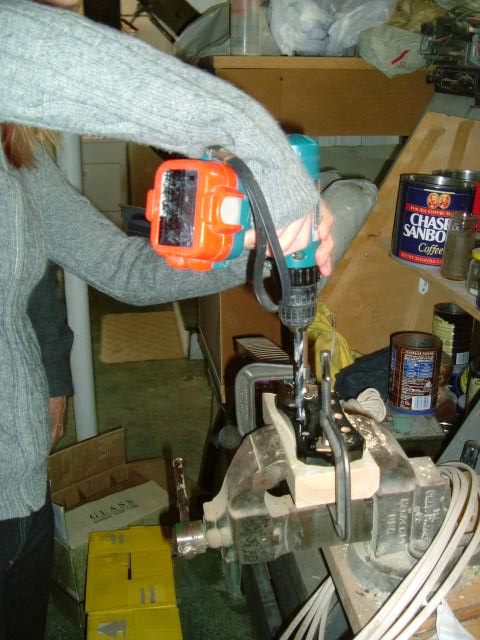
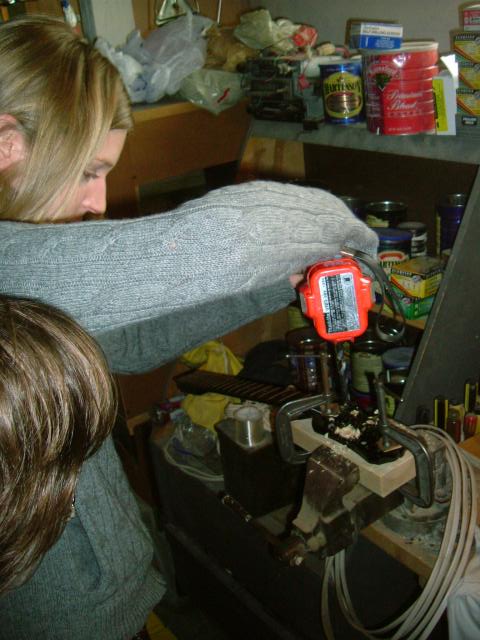
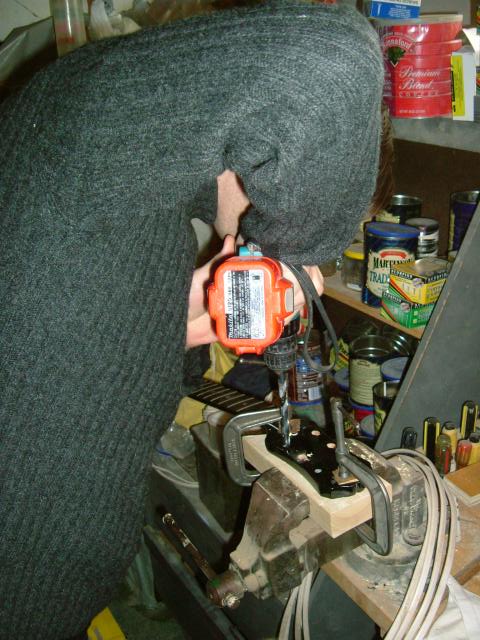
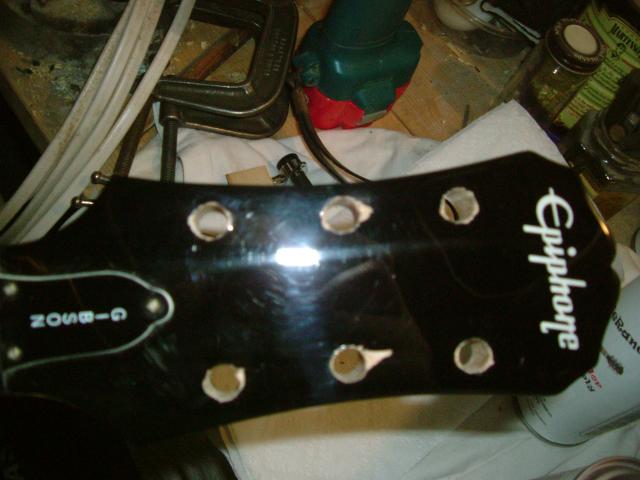
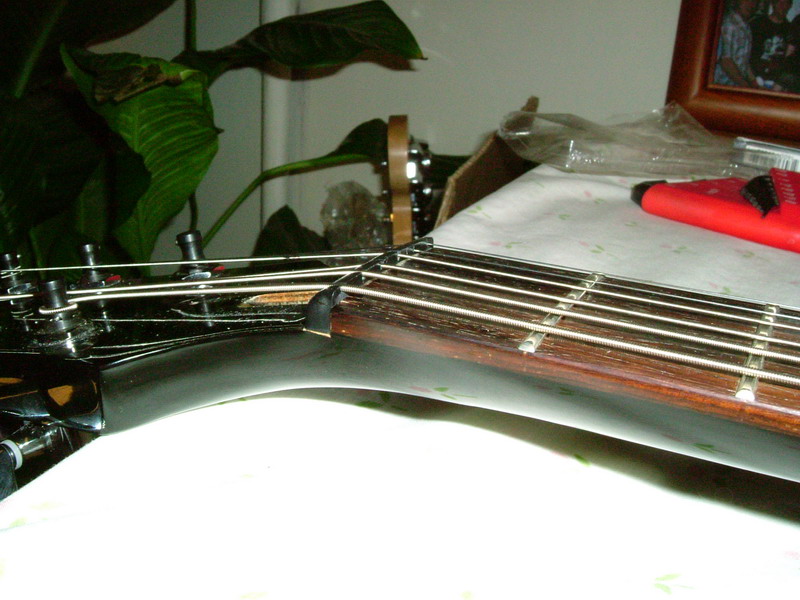
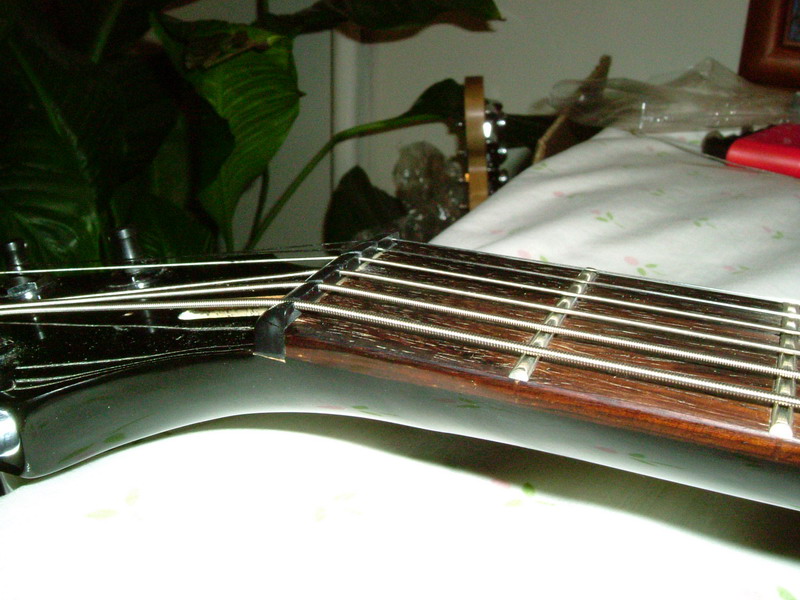
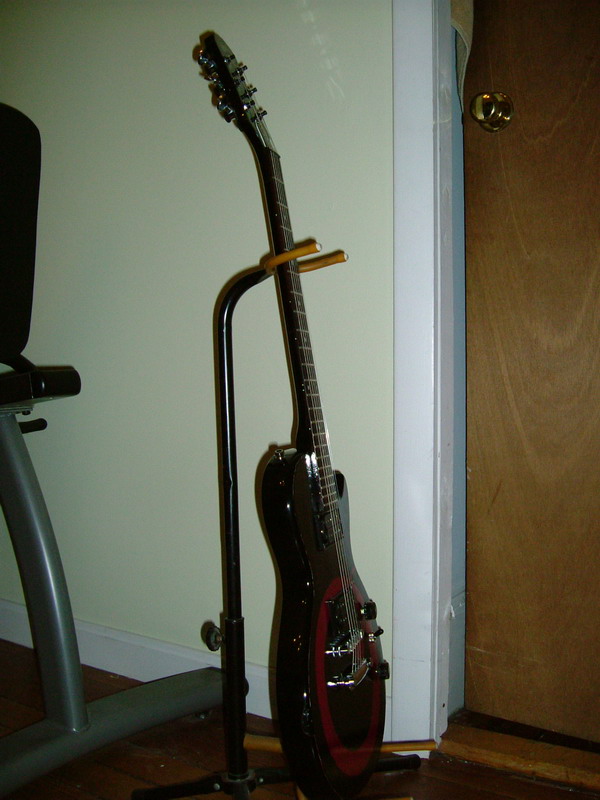
I got the Planet Waves Auto Trim Tuning Machines ($60 through Musician's Friend) on Tuesday, so I decided not to waste any time and dig right in. I removed the old tuning machines, which were cheap and felt like plastic. Each one had different tension levels when turning it and some were loose. I tried to pop in a new one and discovered that the radius of the peg on the new ones was quite a bit wider. Apparently my guitarra friends had been through this same issue last year with a Fender peg head and the same tuners. They recommended that I drill wider holes. Seeing as I don't have any drill bits, clamps, or spare lumber, that's another job for my trip to NH.
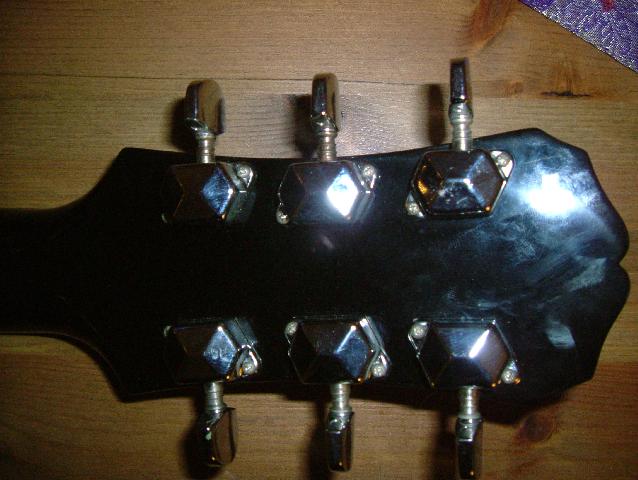
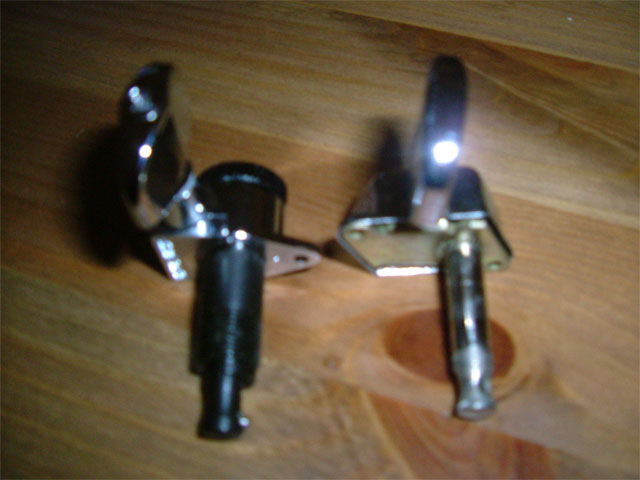
On Friday evening I packed up all my supplies and the guitar and head up to NH. When I got there I wet-sanded the existing red coats with #600. The next morning I set up in the basement to paint and continued doing coats of red. I tried the nozzle with the rotating fan this time, though I didn't really notice a difference. I would like to get a wider spray area, but oh well. While the first coat of paint was drying, I set up the peg head for drilling. I sanded down the block of wood with #220 and used little chips of wood to cushion the metal of the C clamps in order to not scratch the finish. The drill bit I used looked to be the right size. I let Steph (wife) and Greg (brother in law) drill some of the holes. It turns out that the bit was a hair too small and I couldn't get the pegs in. The next size up would have been too big, so I re-drilled but this time I gently wiggled the drill in the hole to expand it a bit. After a few times unclamping, testing, reclamping, and redrilling, I got all the pegs in. I then put the washer and nut on and screwed them in. The tuner for the B-string is slightly crooked, but otherwise it looks pretty good I think. By the end of the trip I had done 3 more coats of red on each side before I decided that I was done with red for good.


I didn't get to any black paint this weekend, which is mildly disappointing, but I'd rather wait if it means doing a better job. Unfortunately it'll be a few weeks before I can get back up there to do some more work on the guitar. Until then, I will try to wait patiently.
I was on vacation in the Bahamas from 2/5 through 2/12 and did not work on the guitar.
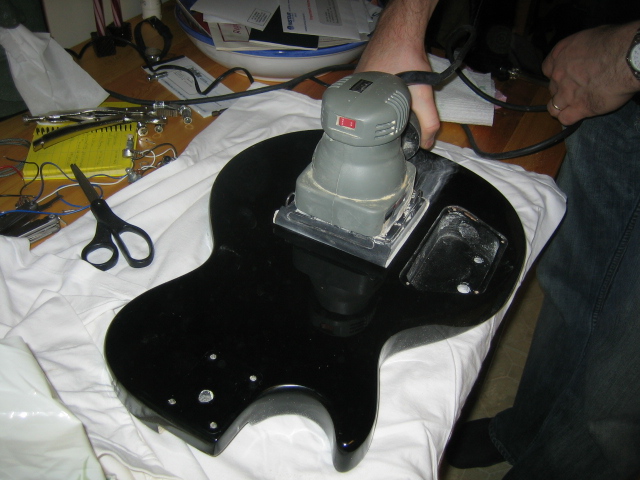
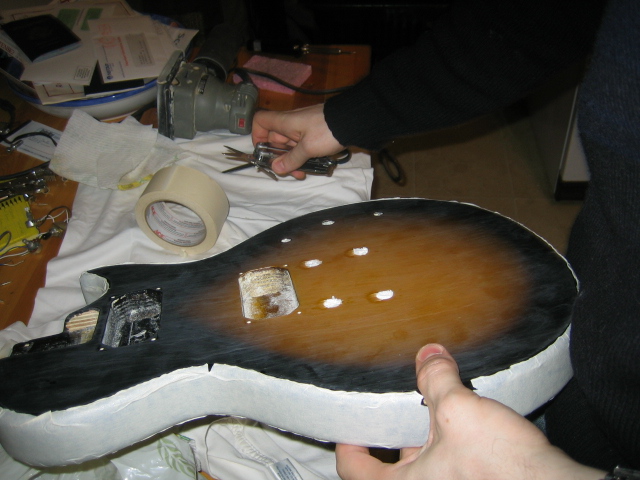
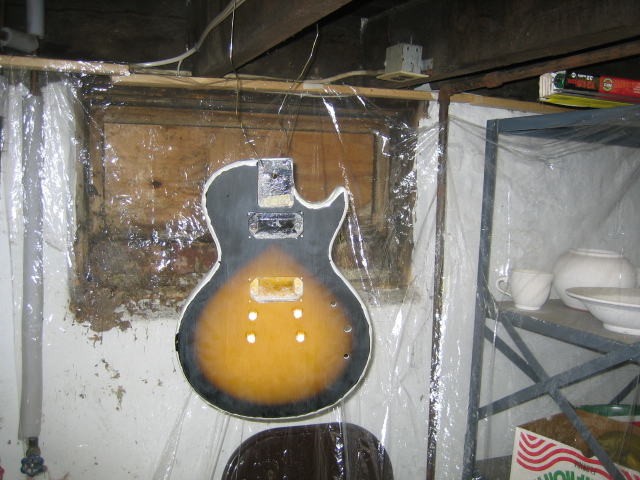
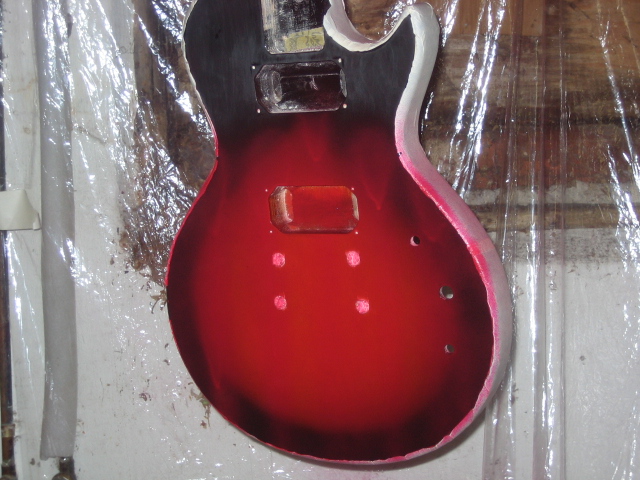
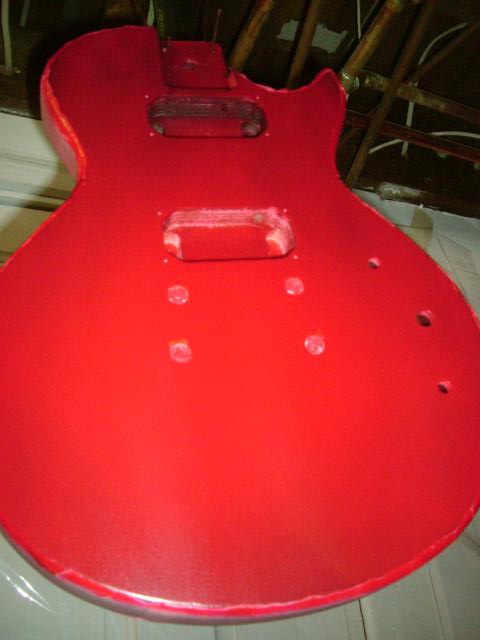
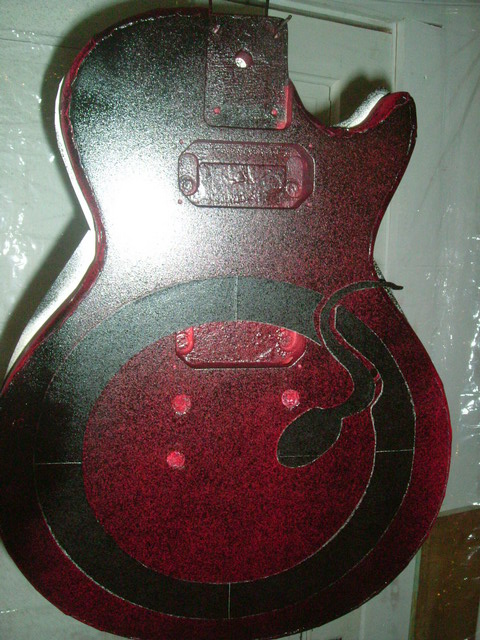
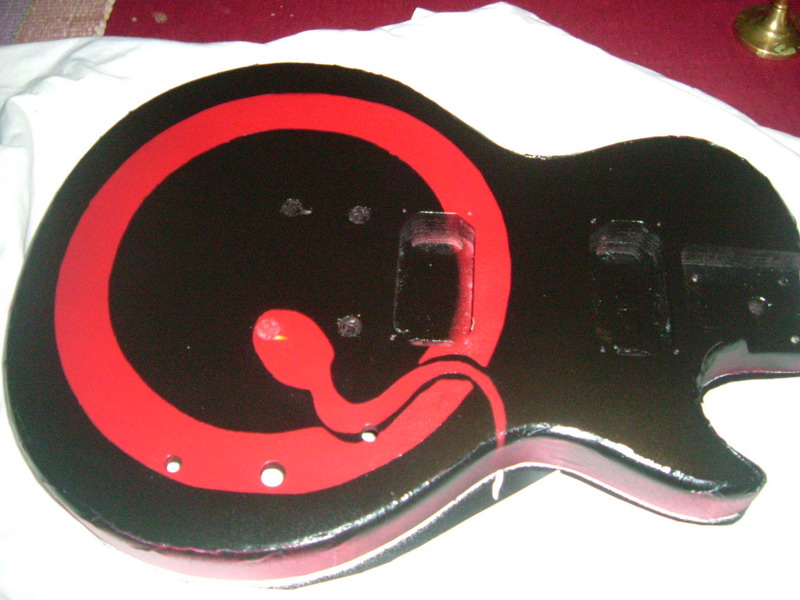
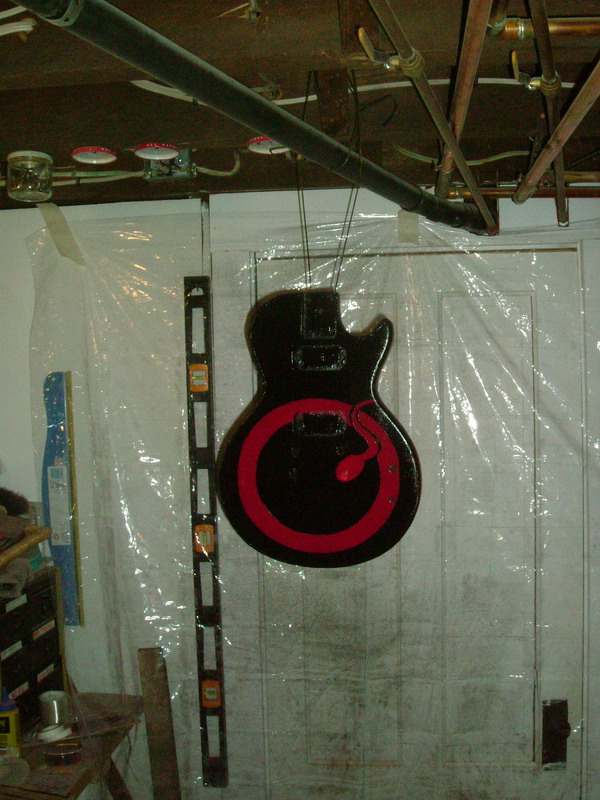
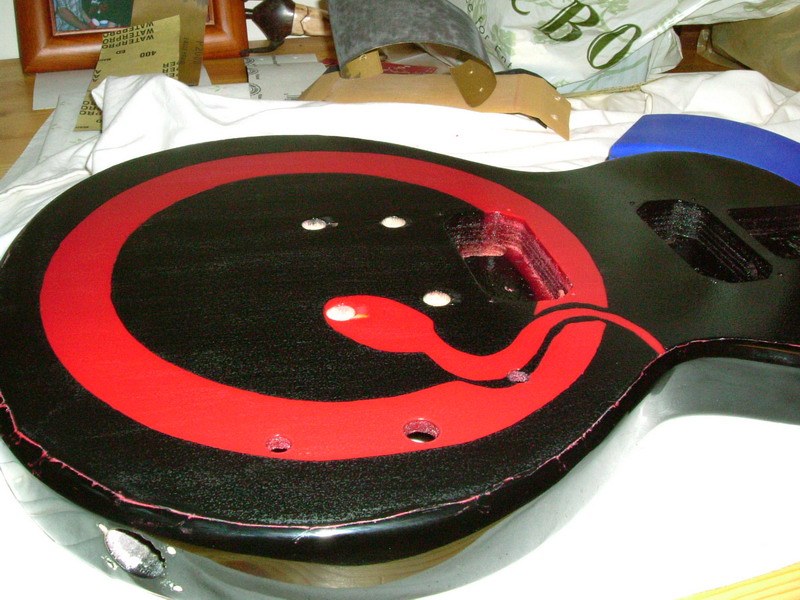
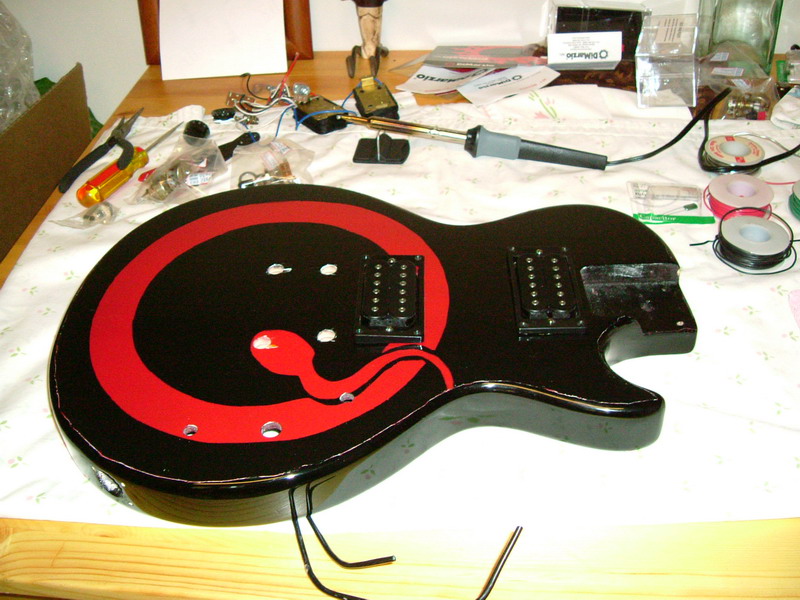
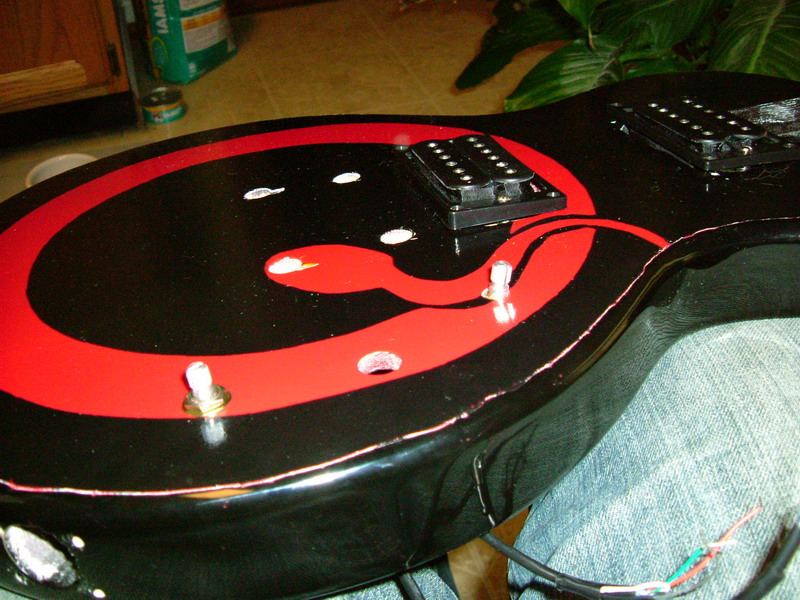
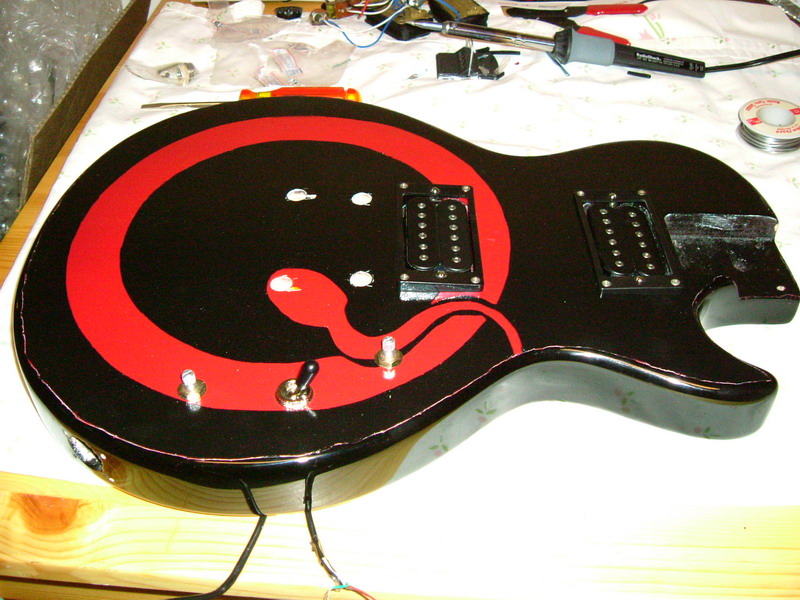
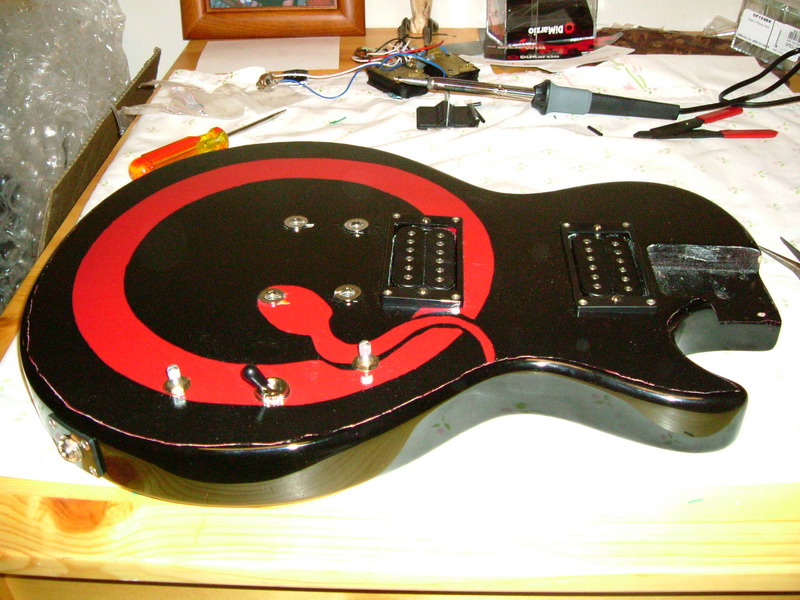
I ordered and recieved the DiMarzio Super II pickups (new, $60 each through zzounds). On Friday I headed up to NH and started by mildly sanding down the final red coats. I then rubber cemented the poster board templates to the guitar and left it over night to dry. On Saturday I got in 3 coats of black on each side throughout the day. I finally figured out how to get the wide fan on the reranch aerosols, which helped quite a bit. The black filled in and opaqued much more easily than the red, as you should be able to see in the pictures. In fact, I think the next time I work on the guitar I will do maybe one more coat of black and then start the clear coats. A very productive weekend of work.


No work on the guitar.
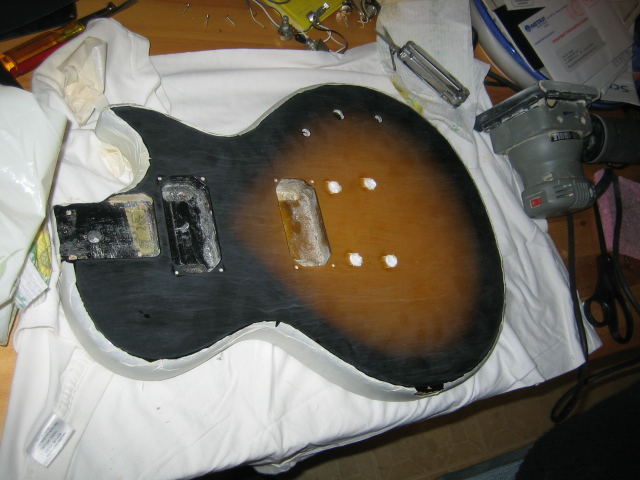
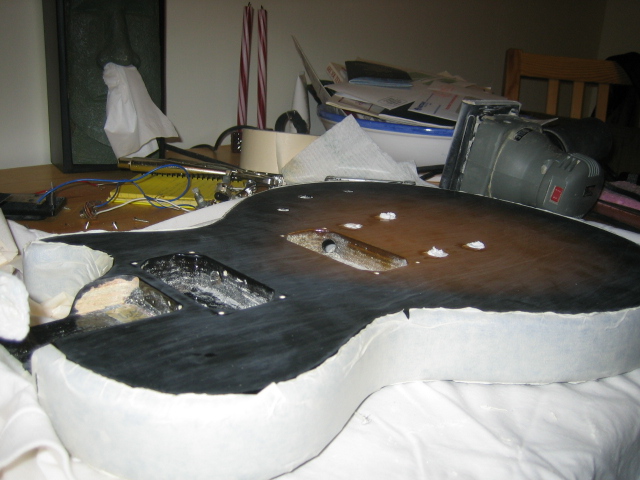
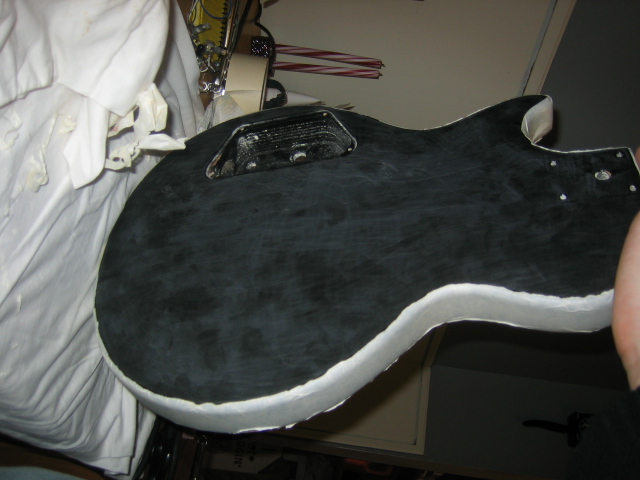
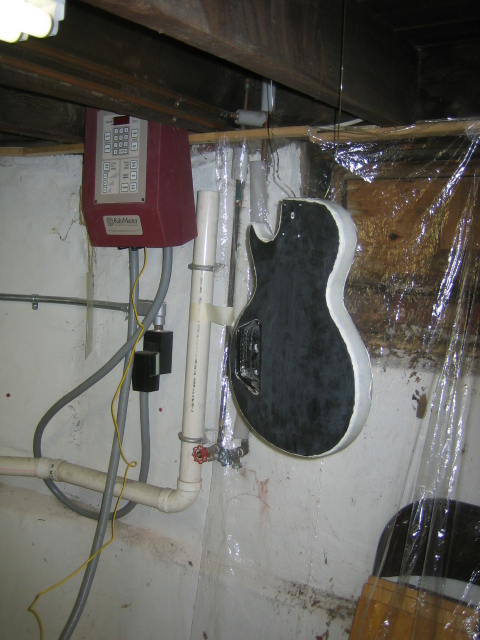
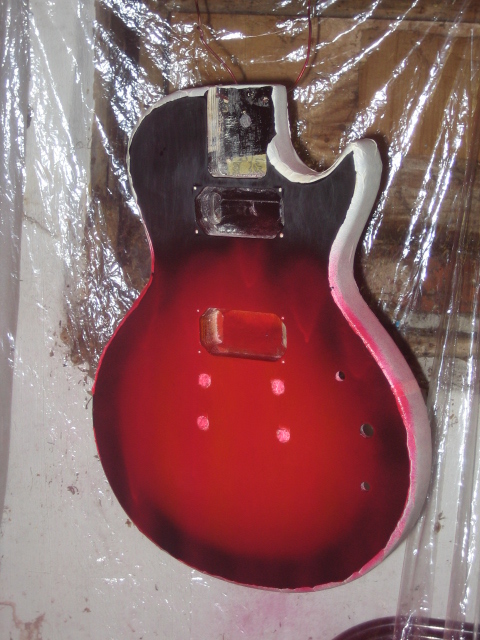
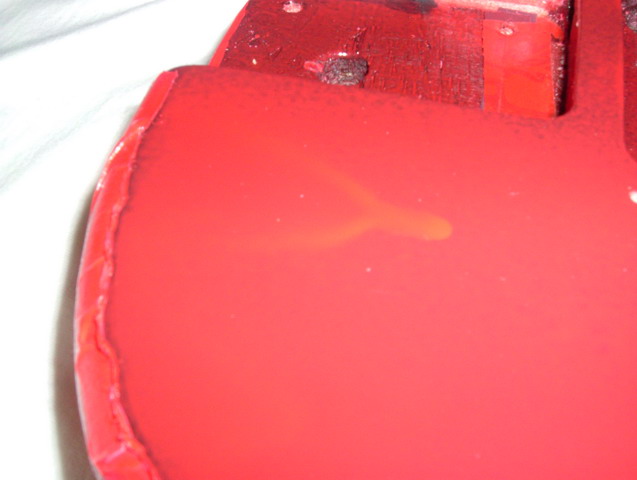
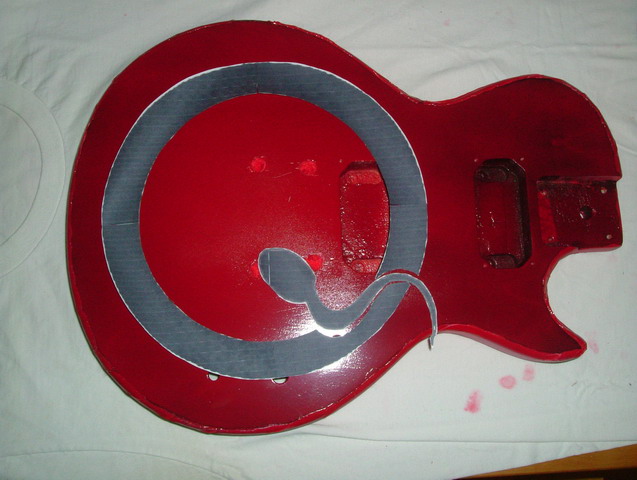
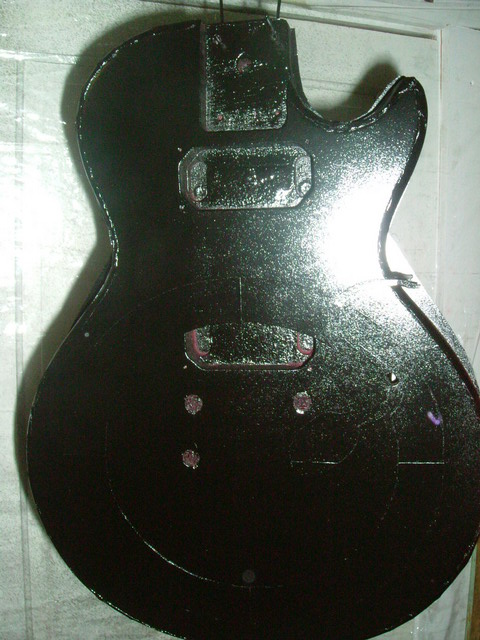
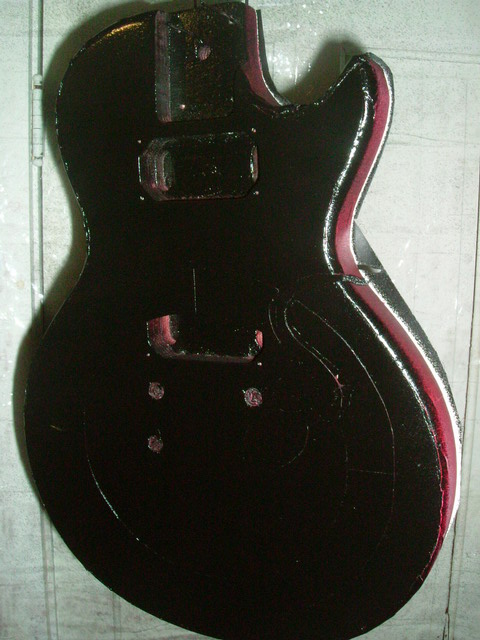
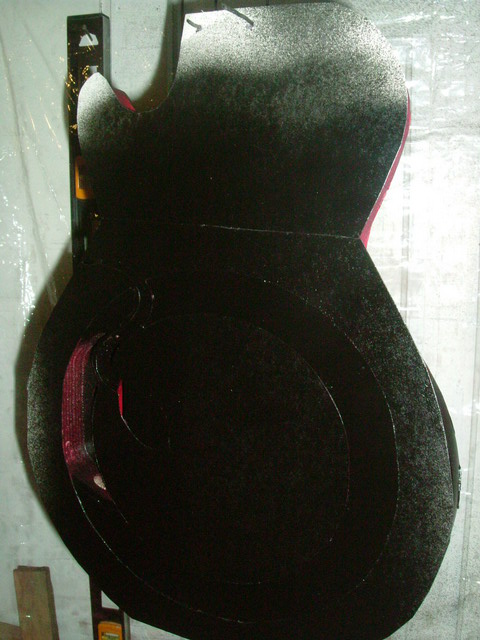
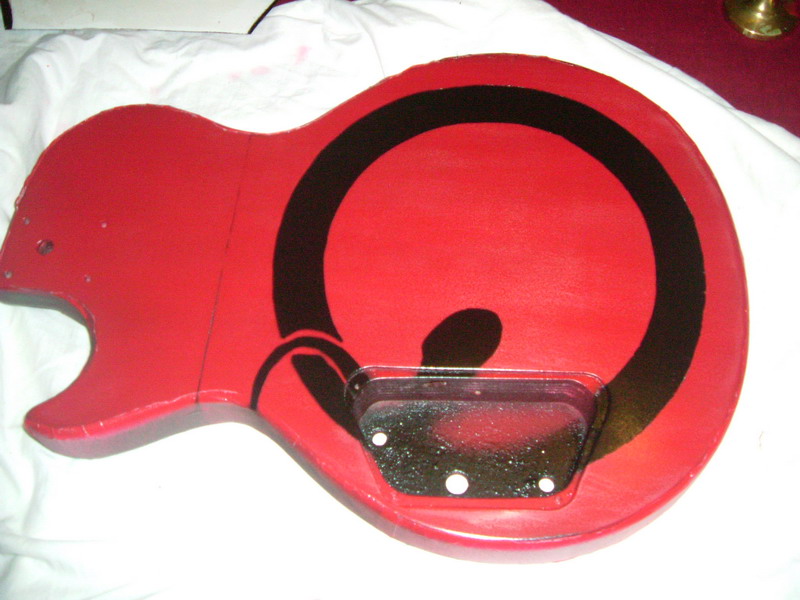
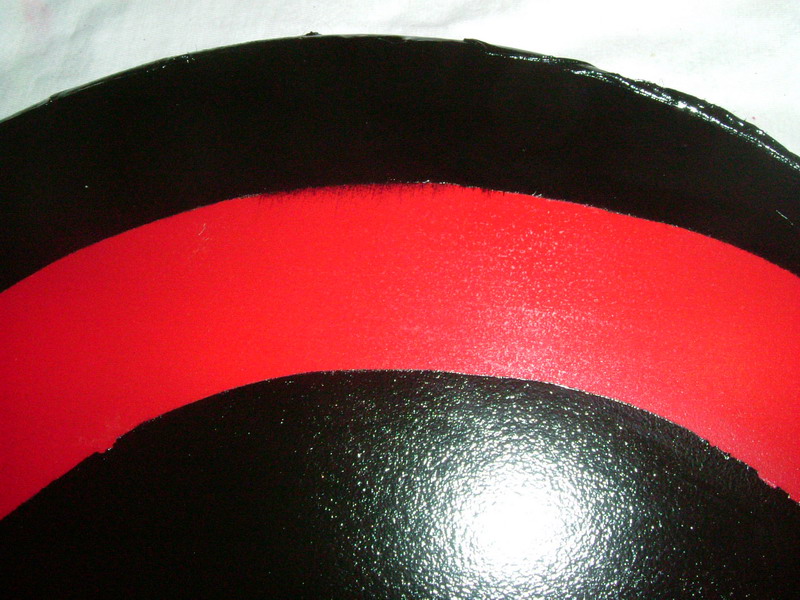
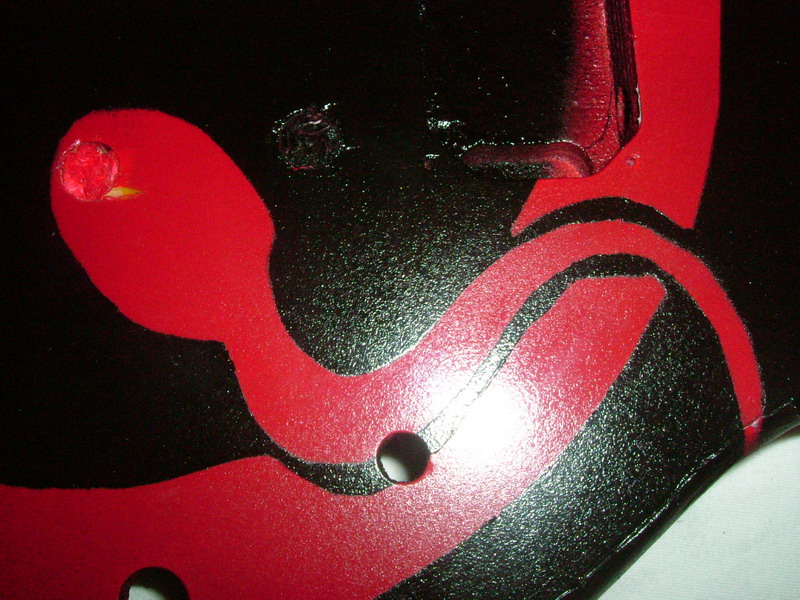
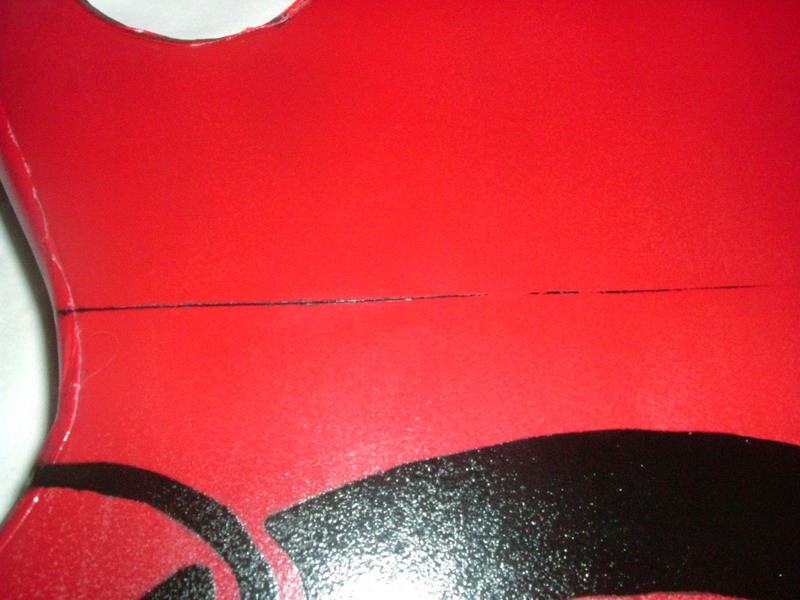
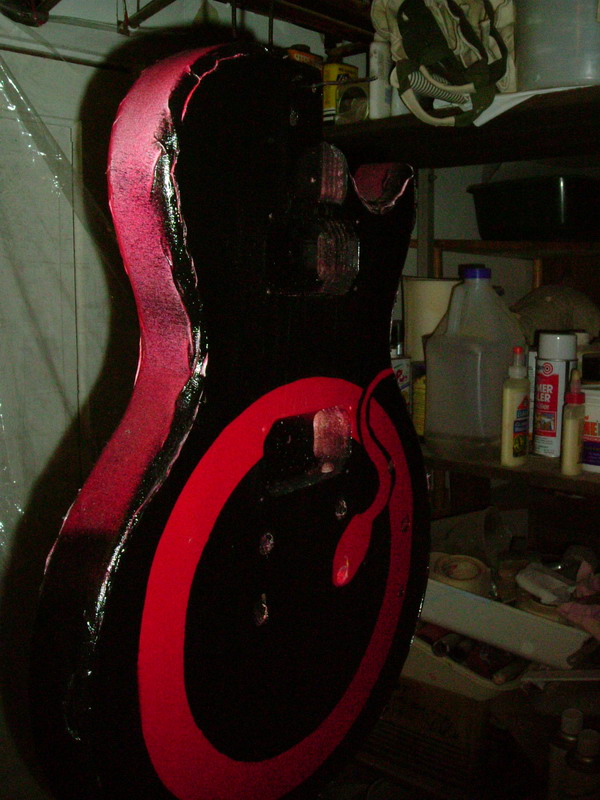
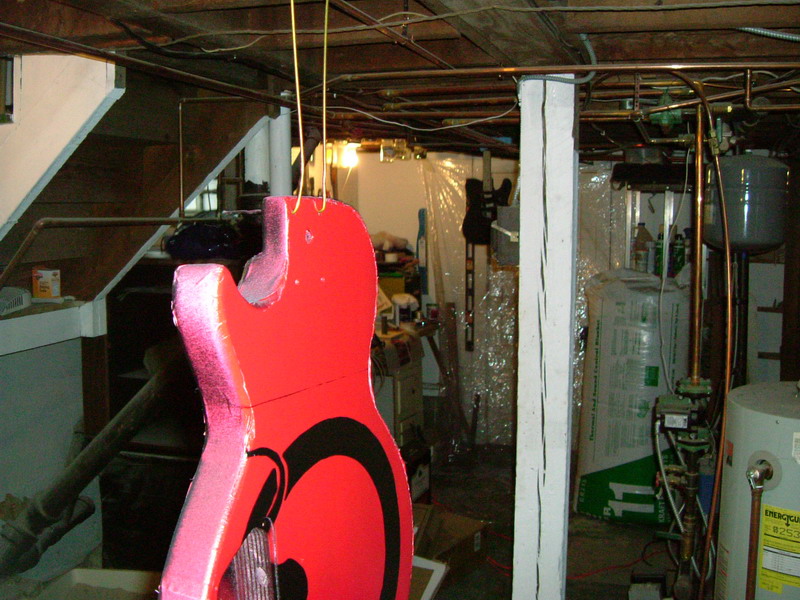
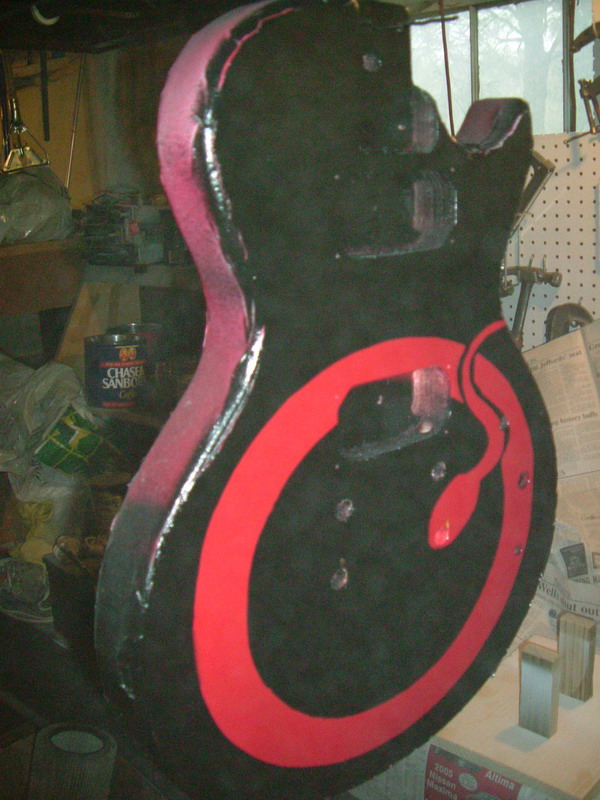
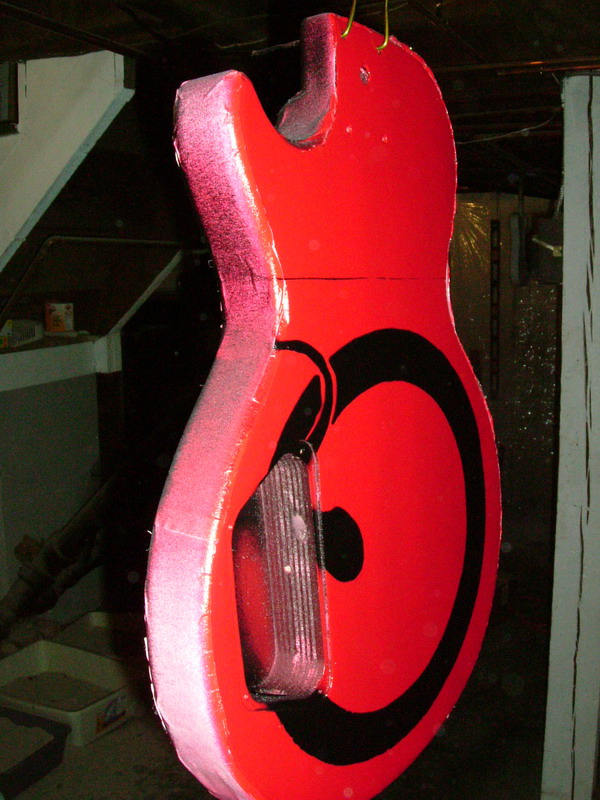
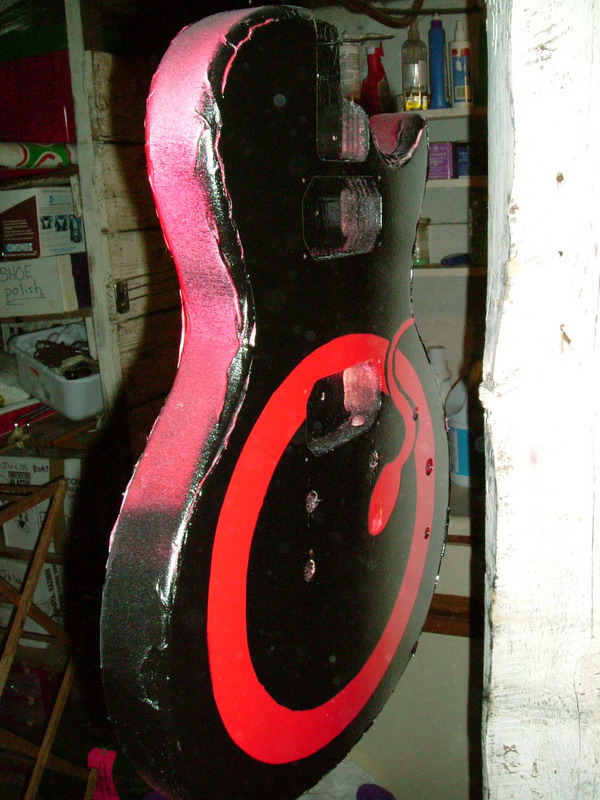
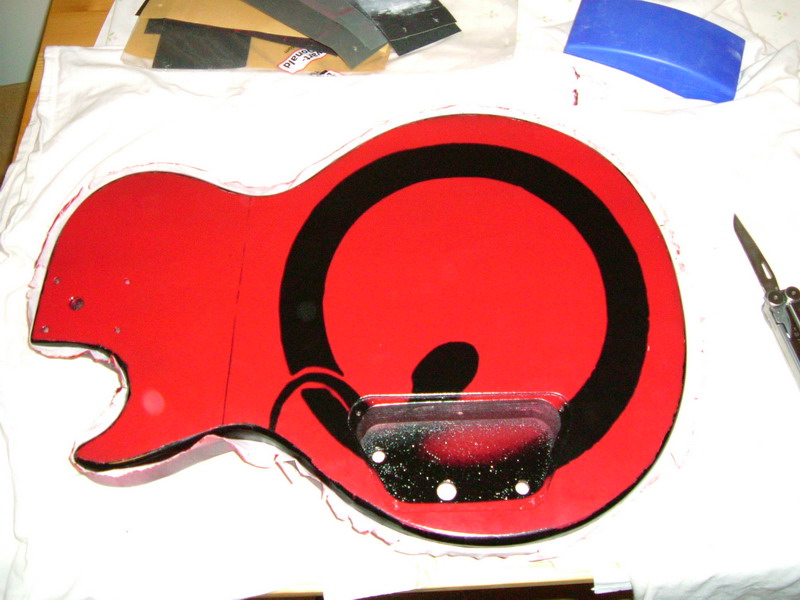
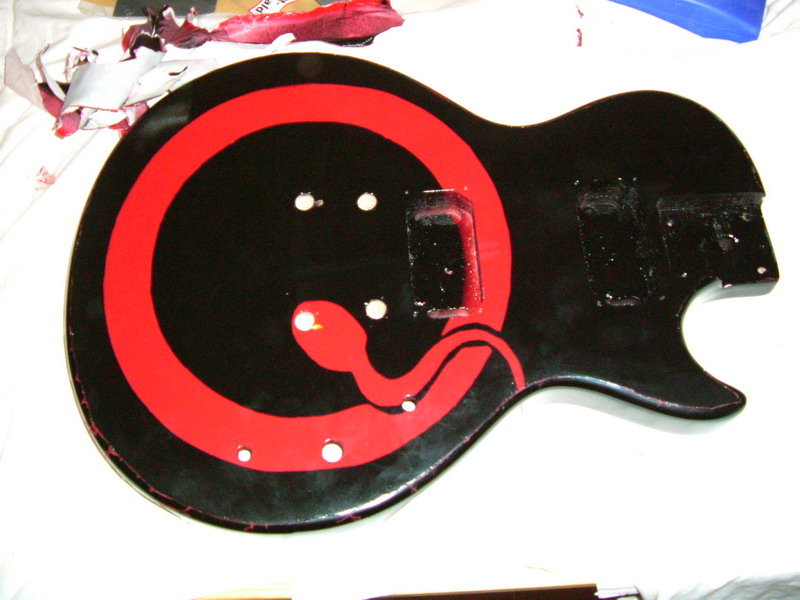
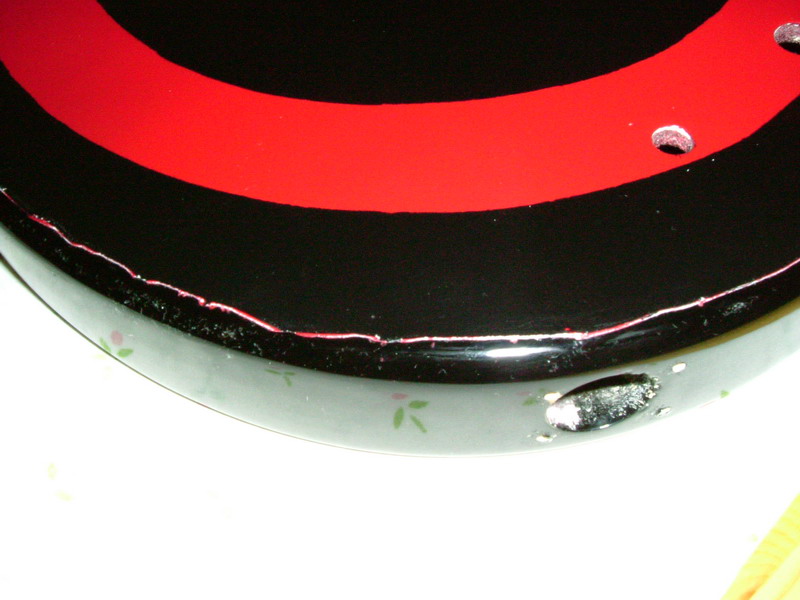
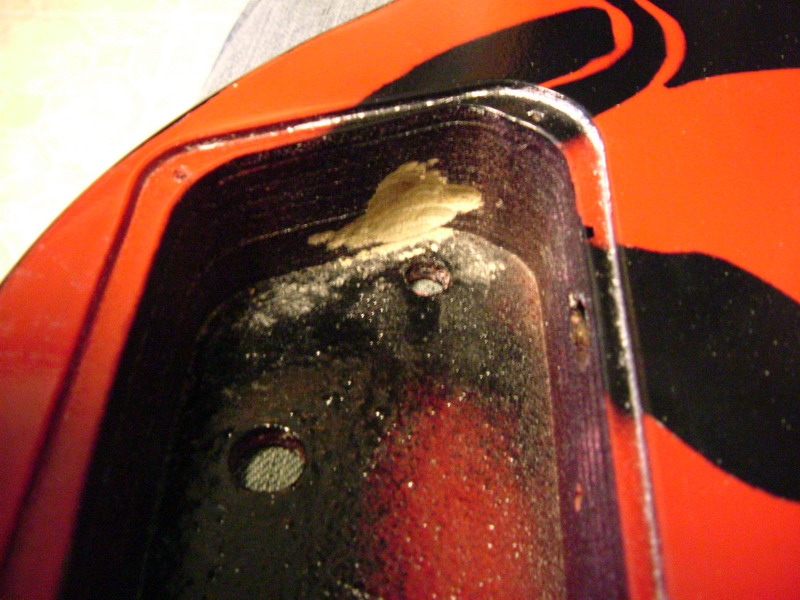
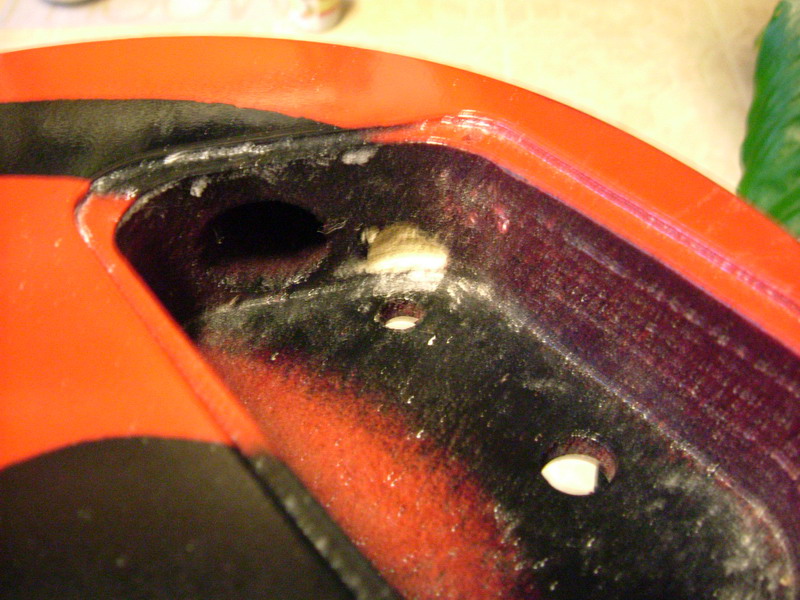
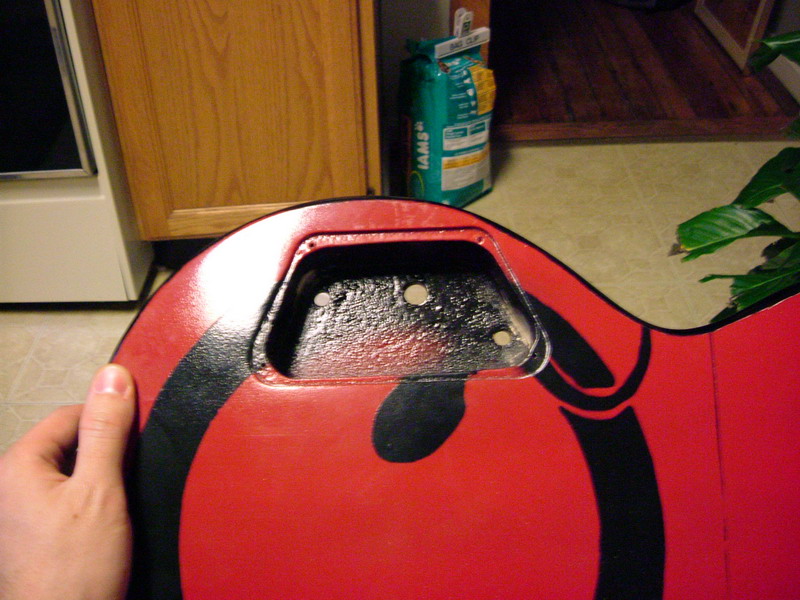
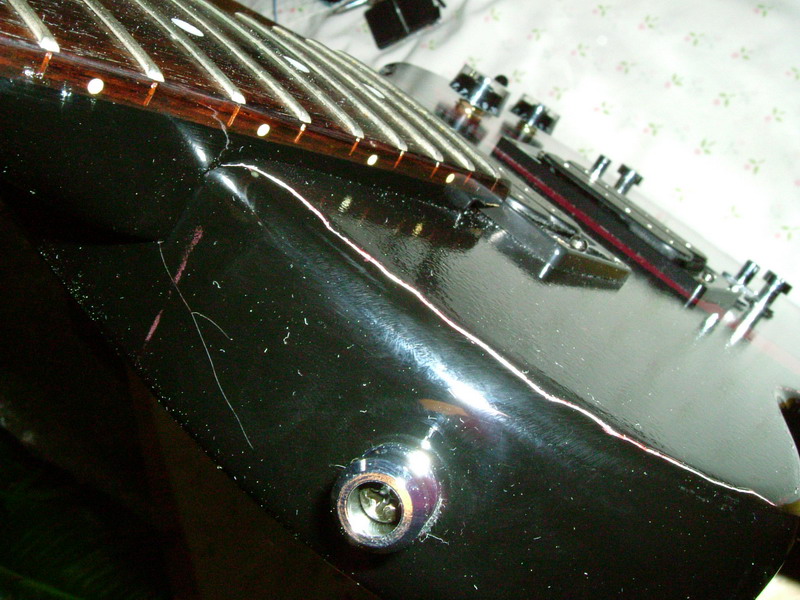
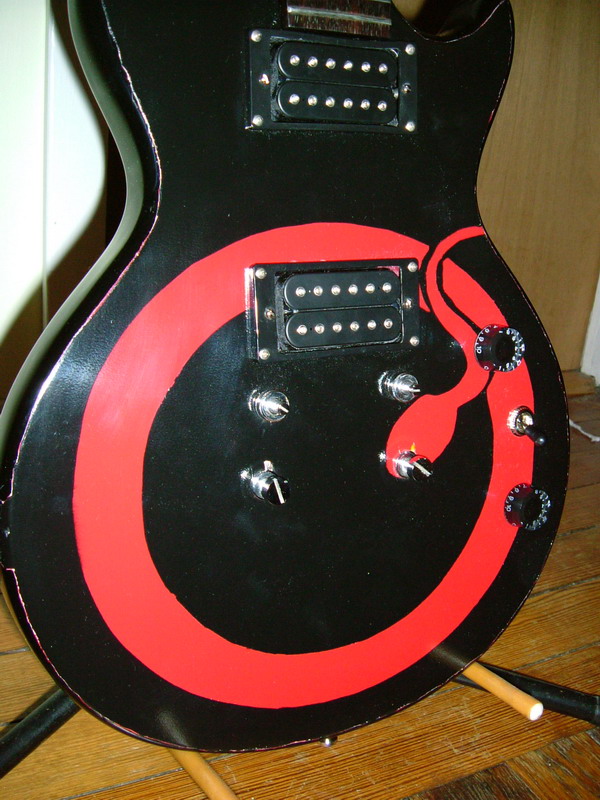
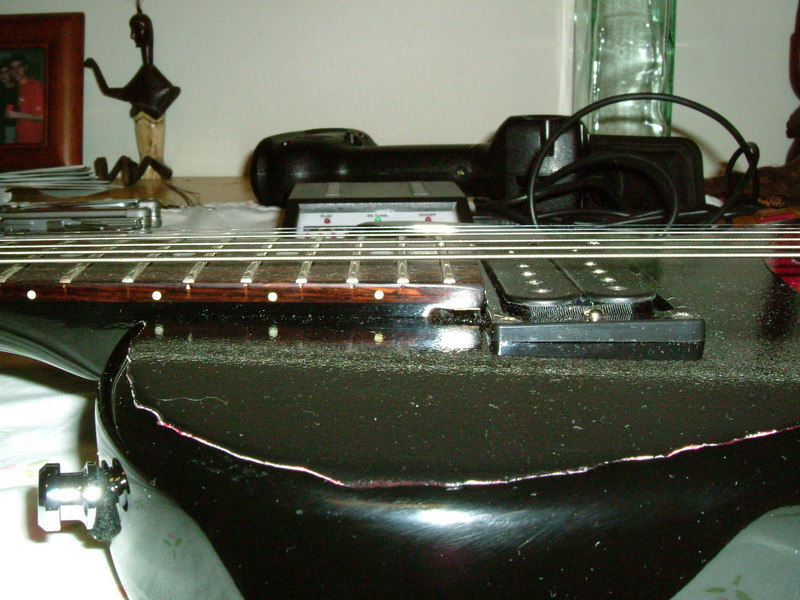
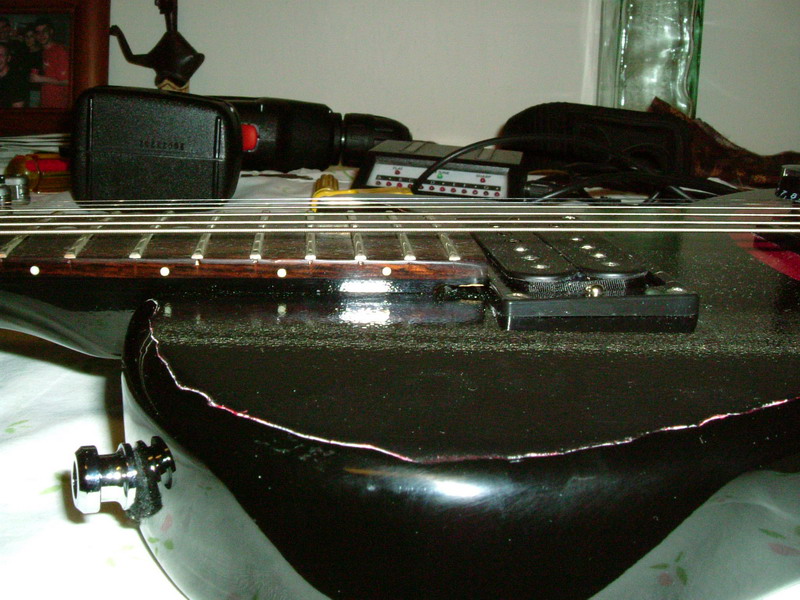
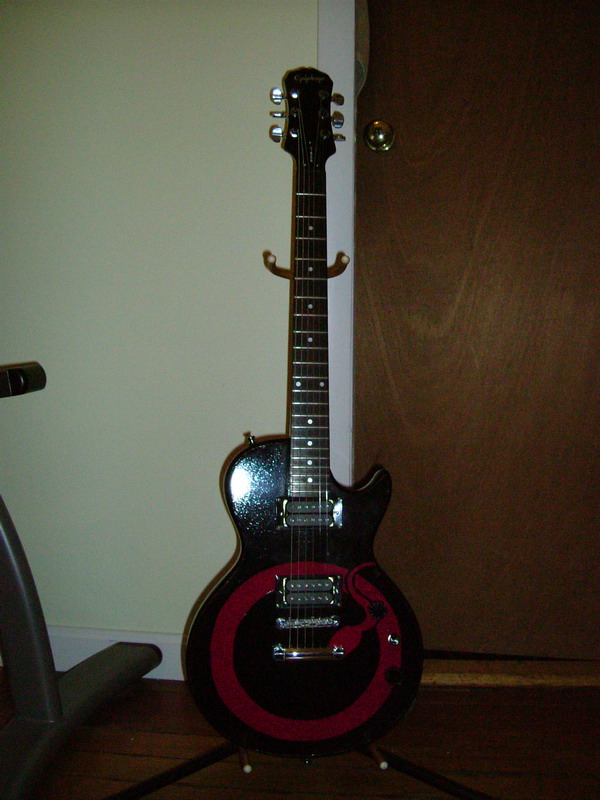
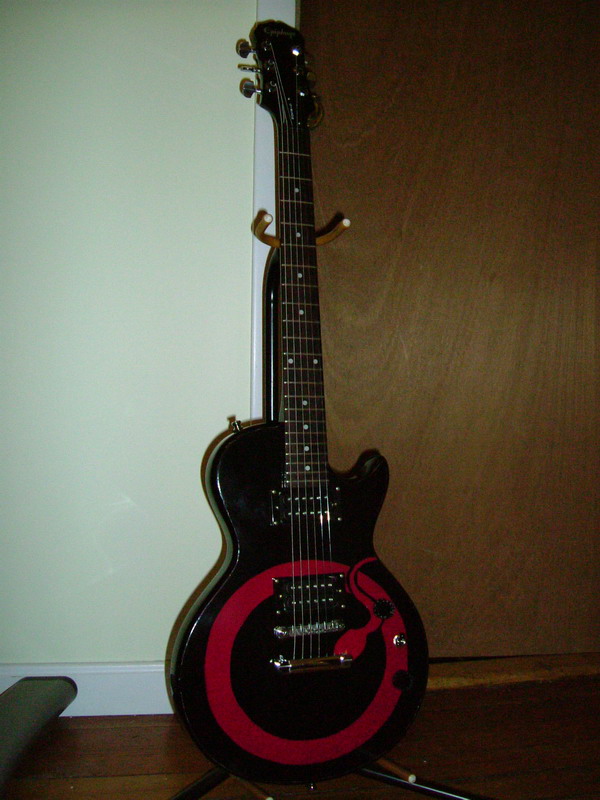
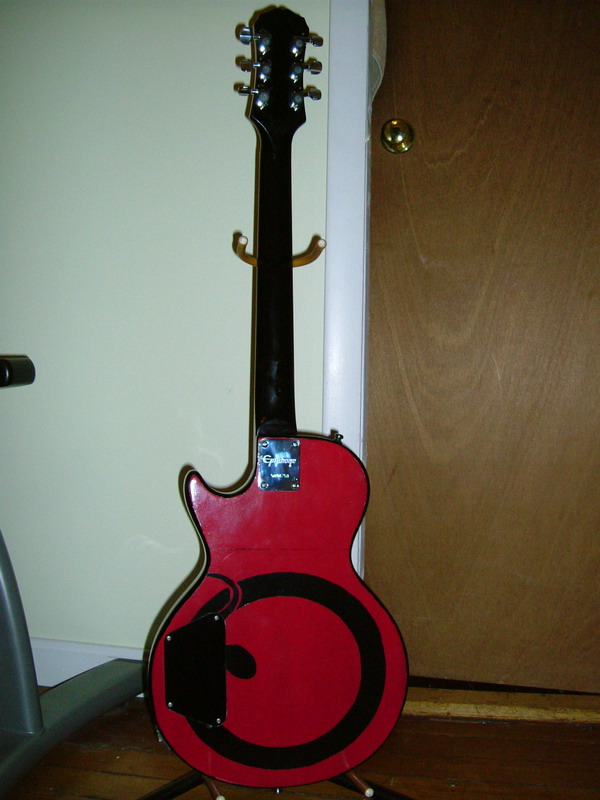
I got out of work early on Friday due to our office moving, so I shot up to Keene for about 24 hours. I got it all set up and shot a final pass of black, then waited an hour or so and started taking the stencil off. There was some concern that the rubber cement would pick up some of the red paint, which it didn't. It did stick a bit to the black nitro that was supposed to remain on the guitar, causing a bit of cracking and peeling around the edges. This is fairly unavoidable (as far as I know) with any masking and I don't think had to do with my stencil technique. It was also fairly minor. One of the pics is a close up of the worst peel spots. It also shows a spot where the stencil wasn't quite glued to the edge and let in a little black. On the back there is by far the most obvious and glaring imperfection. When I cut the back stencil I cut it in 2 pieces. I thought gluing the pieces flush would be enough to keep the paint off, but it wasn't and now I have a pinstripe. Good thing it's on the back of the guitar. I think from 10 feet or so away the thing looks great, which is about all I could ask for my first project of its kind.
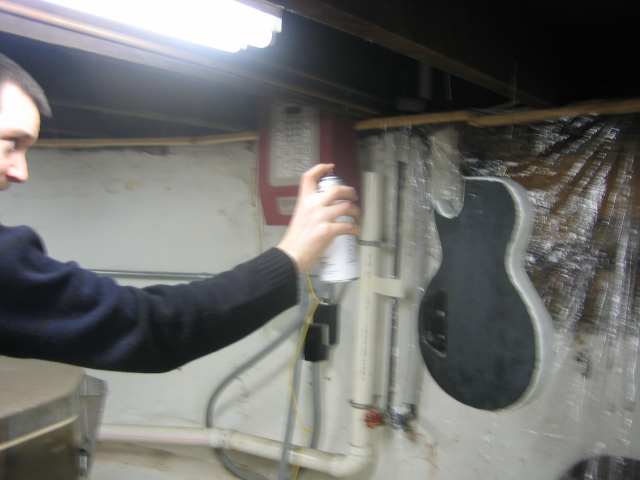
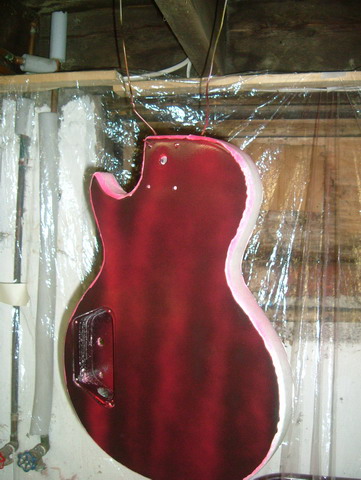
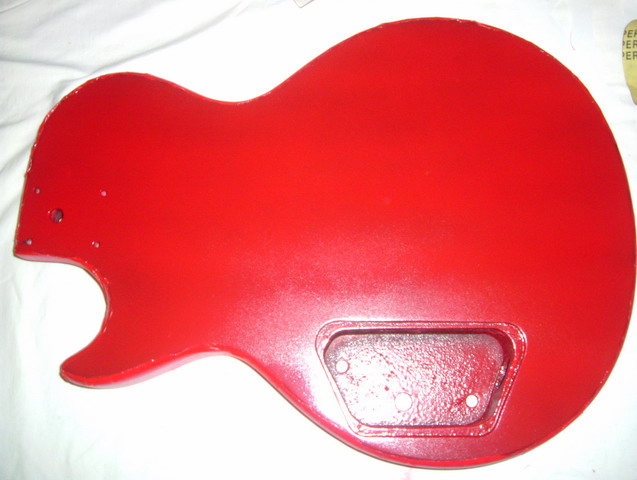
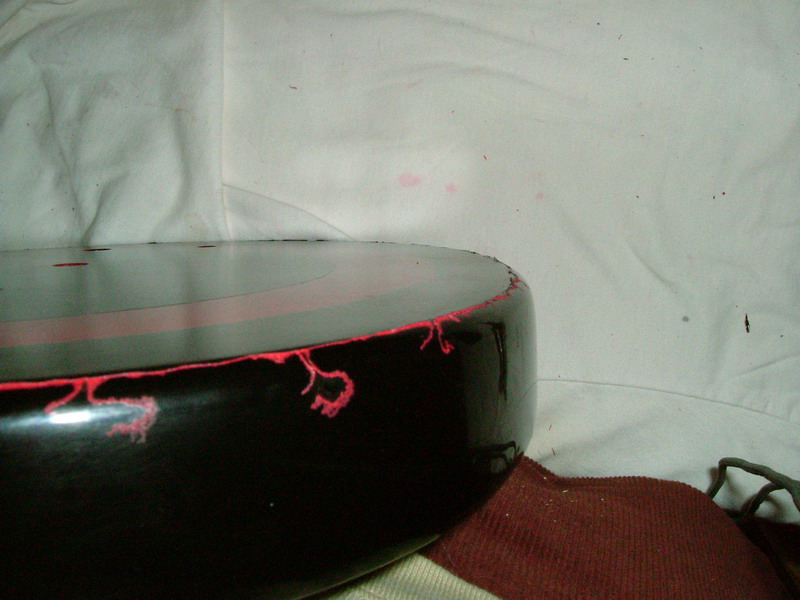
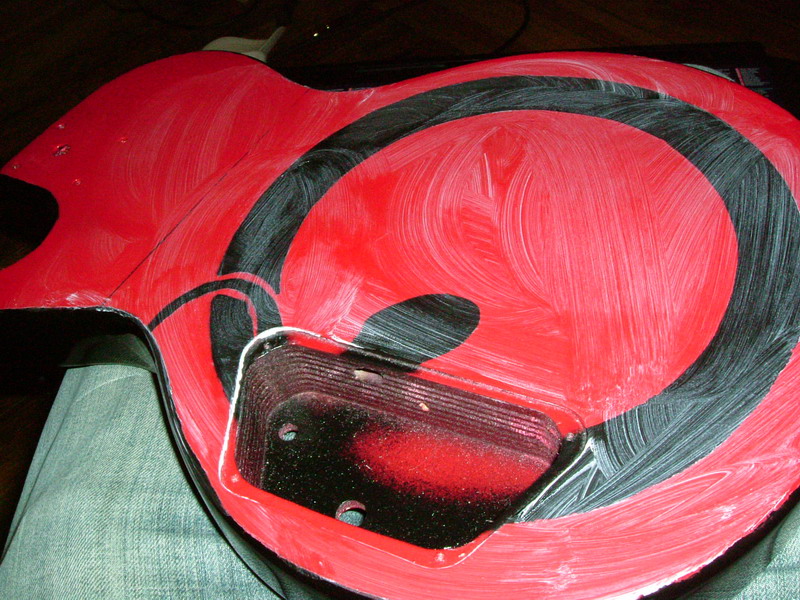
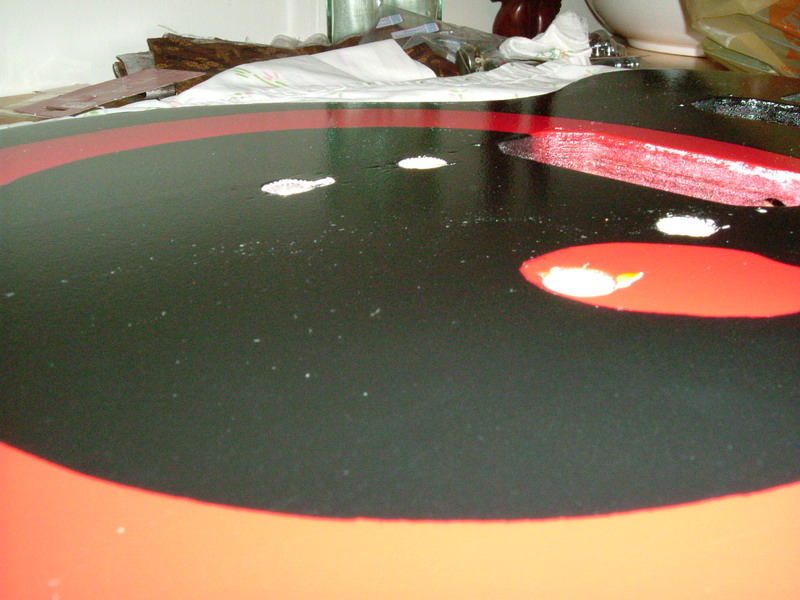
I started the clear coats on Friday night, doing one on each side before bed. The next morning I started shooting on the back and discovered some nasty spotting. I'm not sure what caused it. I brought it up for some repair and while I was messing with it I chipped a small divet out of it with my fingernail. The other bumps I sanded out, but it left sandpaper streaking. I was not pleased. However, I resumed my clear coating and pleaseantly discovered that the clear nitro covered the sandpaper marks nicely. The divet is still there, but once again, it's the back of the guitar and my first refinishing project. It's the kind of thing you only notice if you're inspecting the finish. I had to leave it having finished 3 coats of clear per side. It might be enough, but I'm going to do another weekend to be sure.


No work on the guitar.
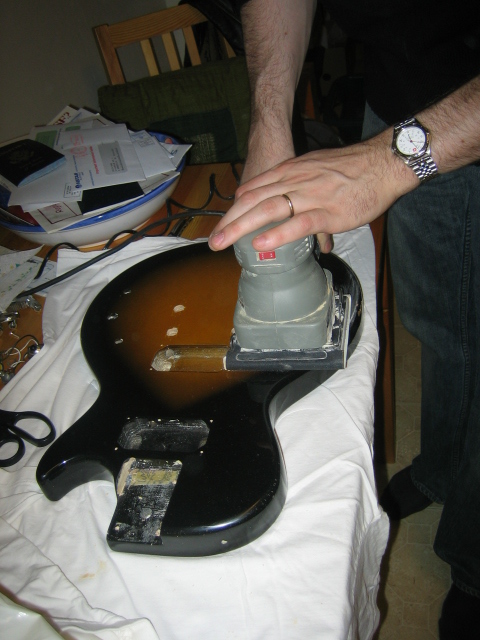
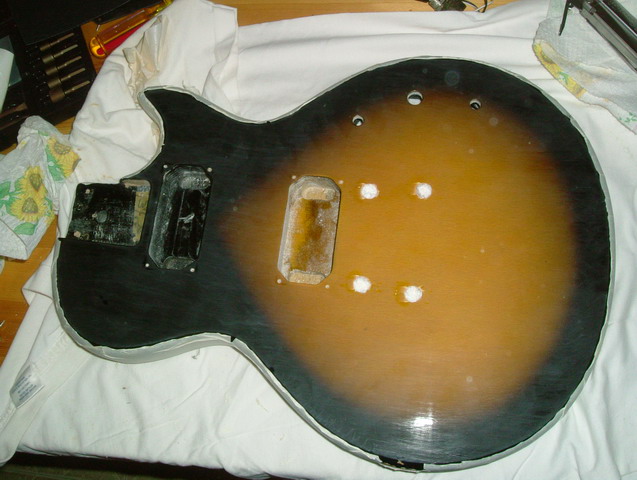
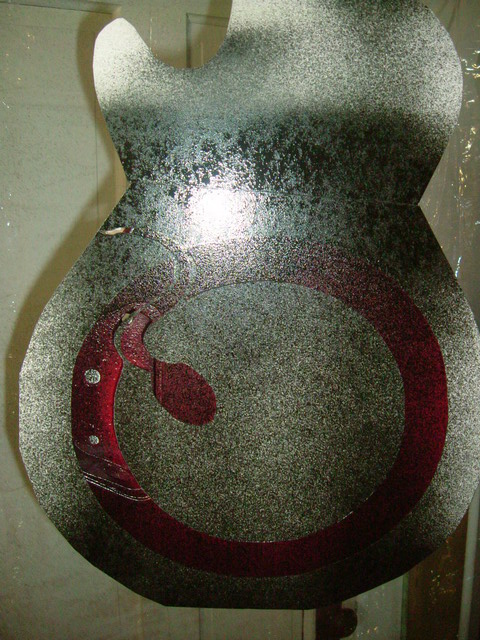
I finally got up to NH again to work. After getting a month or so to dry, the guitar is looking nearly done. However, the finish is quite bumpy up close. This is apparently what reranch meant by overspray or "orange peel". Rereading reranch, it seems that fairly rough sanding is needed prior to clear-coating to fully remove the orange peel roughness. Clearly it's too late for that. Instead, I wet-sanded with #1000 just to make sure my surface would still be as smooth as I can get it at this stage, but without breaking down the clear coat. After that, I did some fairly routine coats of clear. In total, I put 4 coats of clear on each side on Saturday. For better or for worse, I'm done adding paint to this guitar.

According to reranch, I need to wait a few days before moving on.
After allowing the instrument to dry at least three days (with nitrocellulose lacquer, the longer the better) final sanding and polishing can be done.
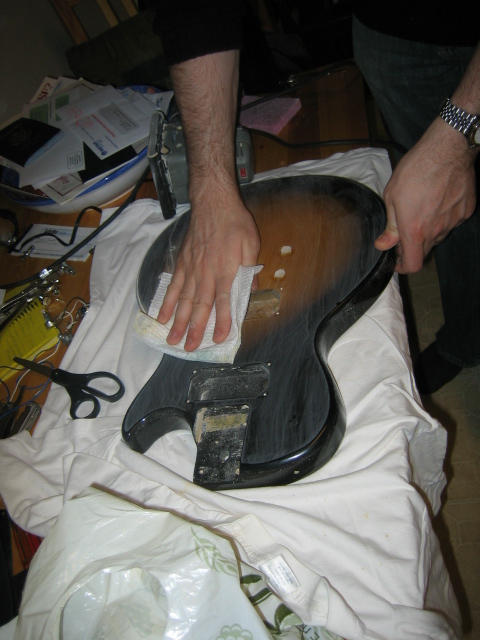
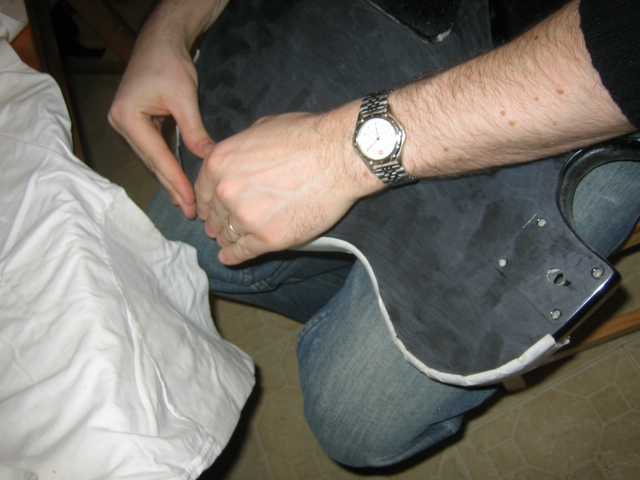
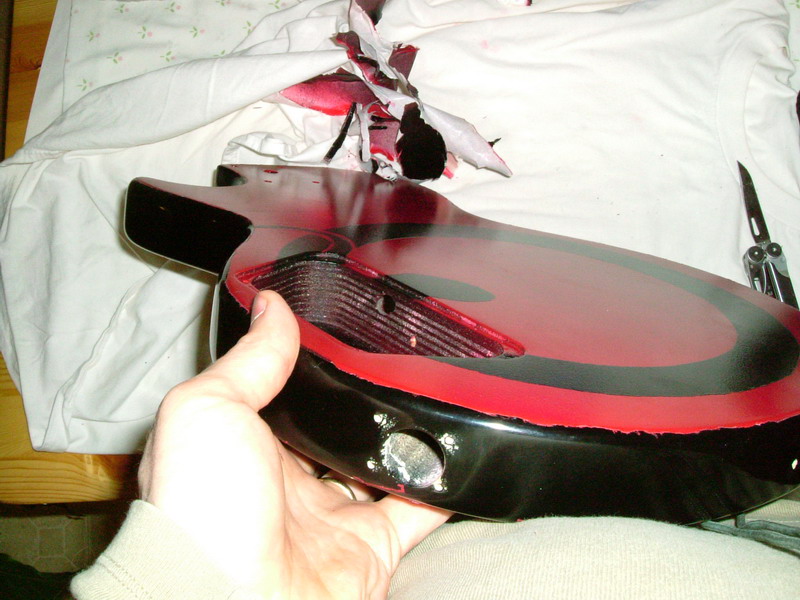
Heeding the advice above, I waited until Saturday to do anything with the guitar. On Saturday I got set up and started taking the masking tape off the sides. There were a few spots where the red bled through the tape. These didn't turn out to be that bad though, as they scraped off fairly easily with a fingernail and a soft piece of plastic. The edging is not pretty, but I knew it wouldn't be. I cut some corners when I taped up the sides.


Now ready for sanding, I refreshed my memory by re-reading the appropriate section in reranch.
The sanding will be done with successively finer grades of paper. The paper found at automotive color supply stores works well. The grades required are #400, #600, #800, #1000, #1200, #1500 and #2000. One sheet of each is all that is required. Allow the paper to soak overnight in water before beginning.
Use a small flat block when sanding to prevent your fingers from causing furrows in the finish. As noted a small computer battery is a personal favorite. Sanding first with the #400 grade, sand until all the shiny spots are gone. When done correctly, the finish should be uniform and matte. As you move up to the next grade check the finish in a good light. You should find that the finish is becoming more reflective and that the sanding scratches are becoming fainter. At the #1200 level the finish is now being polished and should reflect images. If you find you have missed a spot, sand backwards until the grade is reached that will blend the spot and then move back to the grade level where you were in successive grades.
Use caution when sanding to avoid sand throughs. Be especially cautious when sanding at the edges of the body. The finish may be thinner there and the difficulty of keeping the block flat when sanding over an edge can make a sanding through more likely.
After the final grade of sanding is completed, the final polishing can begin. Use a soft cotton rag either folded or shaped into a ball and held between the fingers. Either way try to prevent individual fingers from causing furrows. Polish in random circles. The polishing can be done in steps starting with a white polishing compound. If the surface was prepared as noted in the last section, red (more abrasive than white) compound should not be necessary. In fact white can probably be skipped and the finish can be polished with a swirl remover type polish. We use the 3M product, "Finesse It II" going directly from #2000 to final finish. Skipping the white and red steps may take longer to polish but on a relatively new surface the final polish seems more reflective.
The instrument is now finished. Take more than normal care for the next month or so when playing and handling. The lacquer is still relatively soft and can scratch. The lacquer will continue to harden for literally years but should reach its practical hardness in 30 to 60 days. Enjoy your work with pride.
So the goal is still to follow this as closely as possible, though I was a bit skeptical on doing that much sanding. Painting took forever and I really really didn't want to do anything that would require more painting or touch-ups. I started with #400, doing very light passes once over the top and back. This made very obvious mars and scratches. I moved up to #600 and did the same thing. I think I then did one pass of #1000, before I skipped up to #2000. At #2000 I was a little more thorough, though the result didn't really match the description of polishing. It just made the finish look all dull and scratchy. I don't think I was really following the instructions correctly, but I felt that I needed to play it safe.


So I went right for the polish. Things were starting to look better after a couple of coats of polish, but scratches and dull points were still fairly visible. More polish is needed.
Throughout the week, whenever I had the chace, I applied additional coats of polish and rubbed it down. Gradually, the luster returned to the finish, though I can still see a scrape or 2 if I look hard enough. At this point I concluded that it looks as good as it's going to get. There is what reranch refers to as "orange peel" all over the surface, mostly on the black. Apparently I sprayed too dry when I did the black and I didn't correct it for fear of sanding through red or smearing black into the red. Now that it is clear-coated, there's no fixing that without doing much of the finish over. In the end, the finish is far from professional, but looks pretty awesome to me considering all that didn't go perfectly.


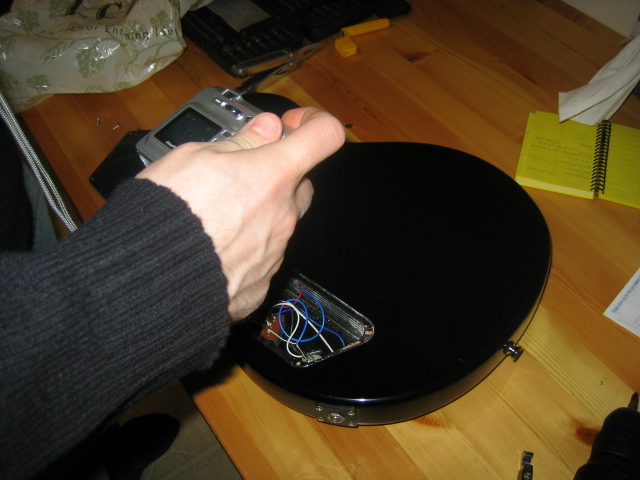
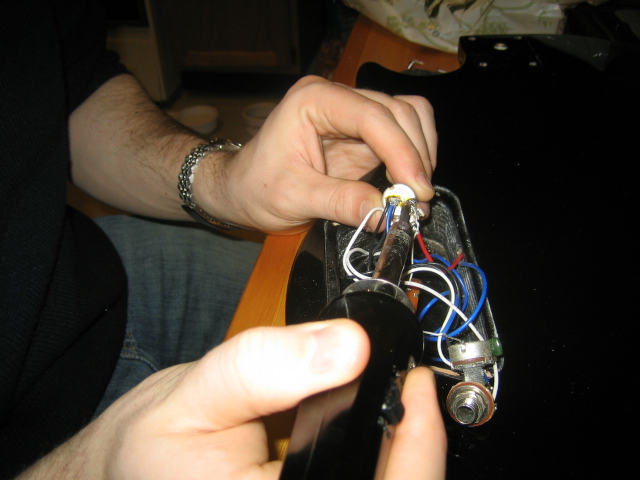
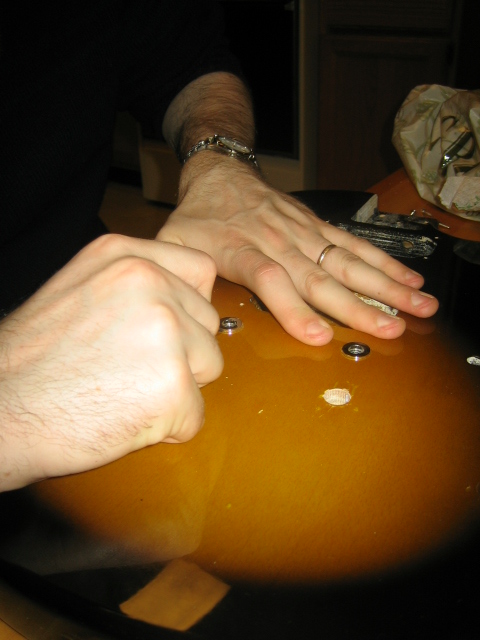
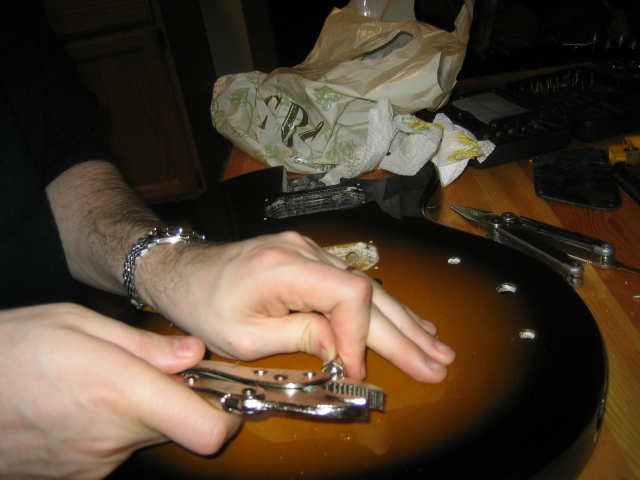
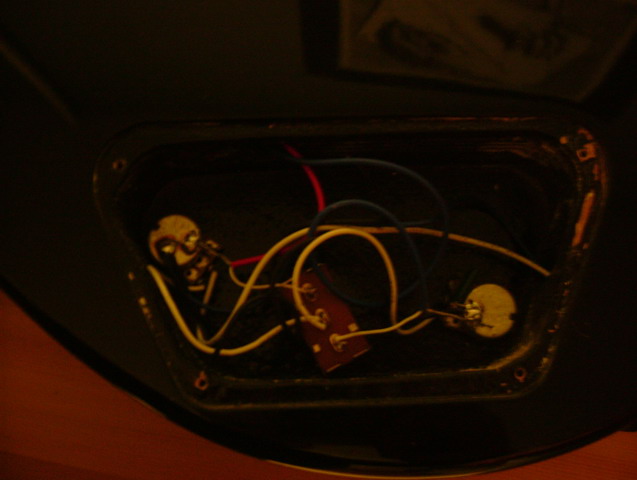
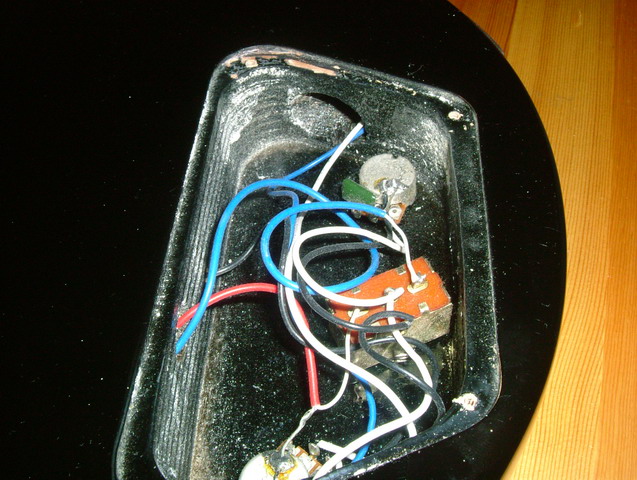
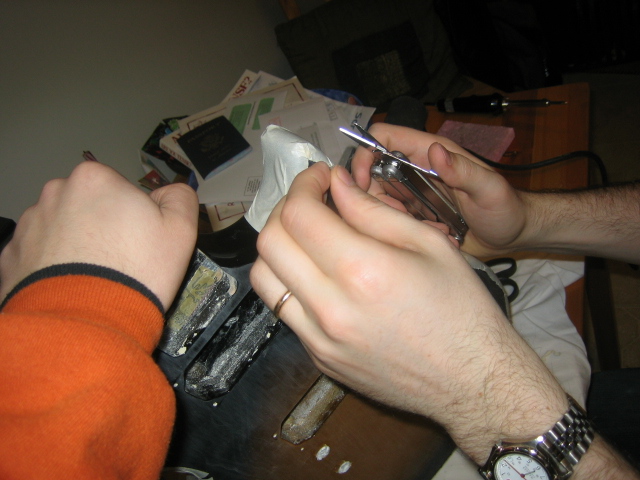
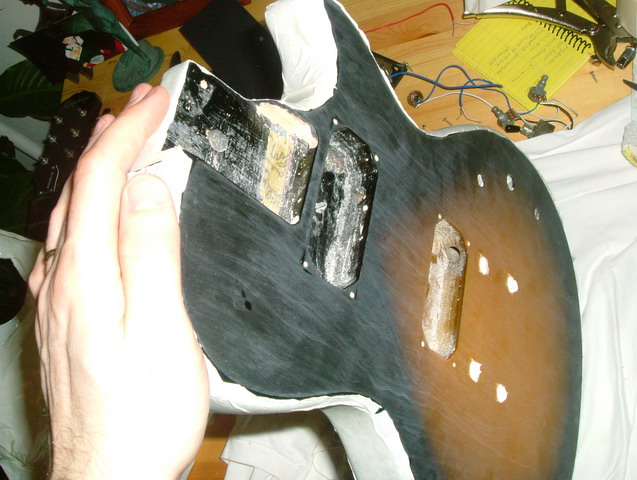
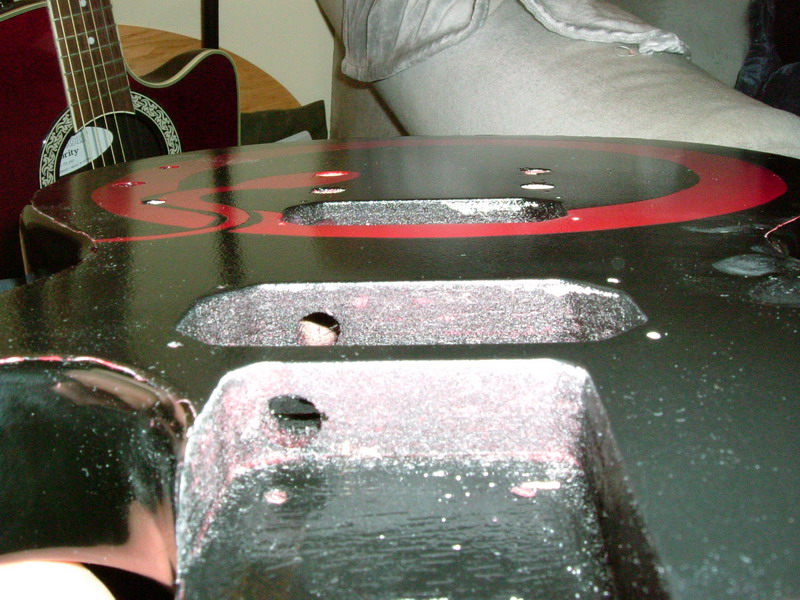
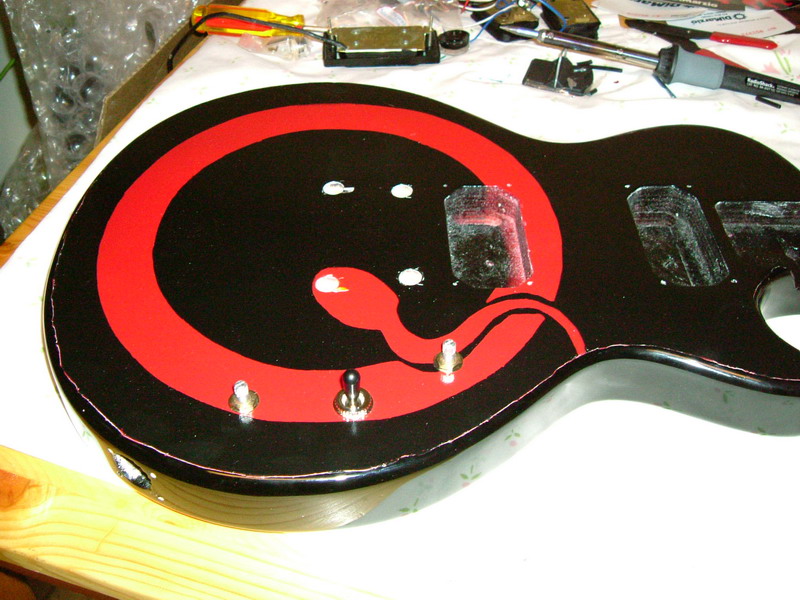
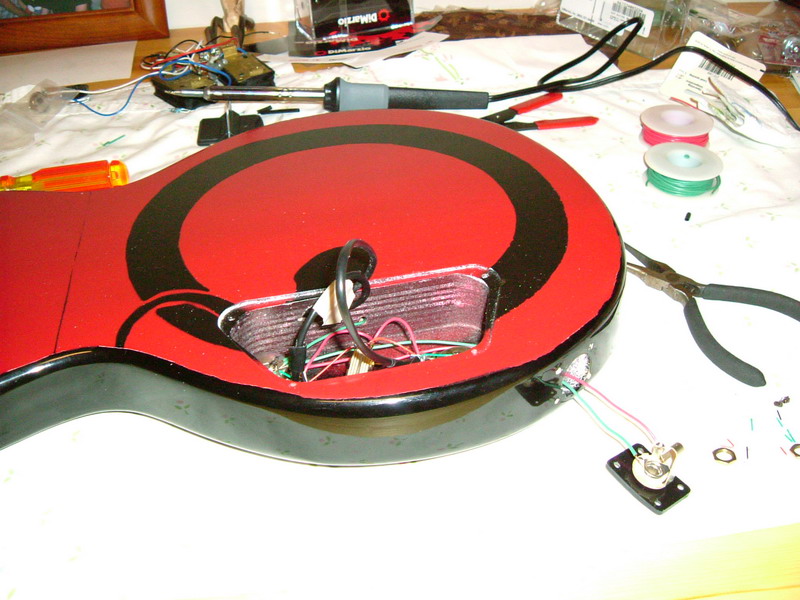
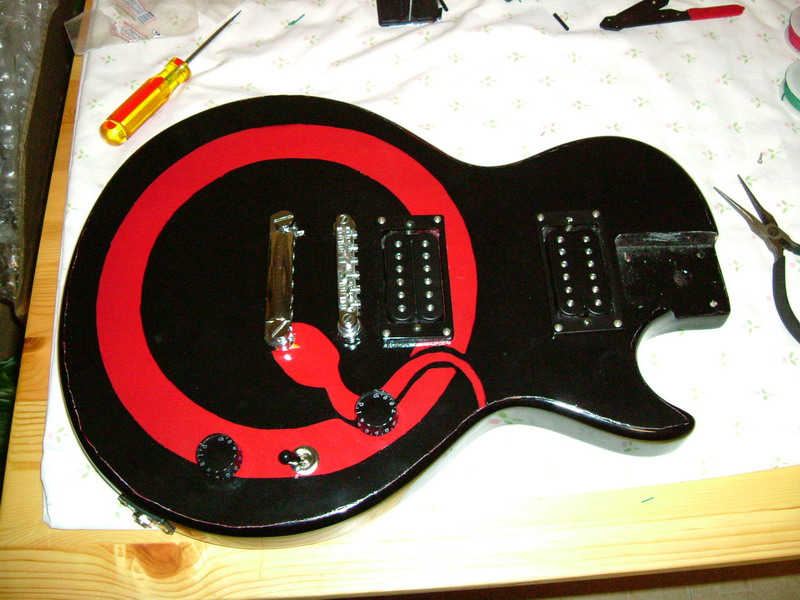
And onto the wiring. The prior week I had done some experiments with the old electronics from the guitar, trying to understand the circuitry and rewire the guitar. I failed to get a working circuit apparently because I fried one of the cheapo pots that came with the guitar. However, I did learn some things and I felt fairly ready to try it for real.
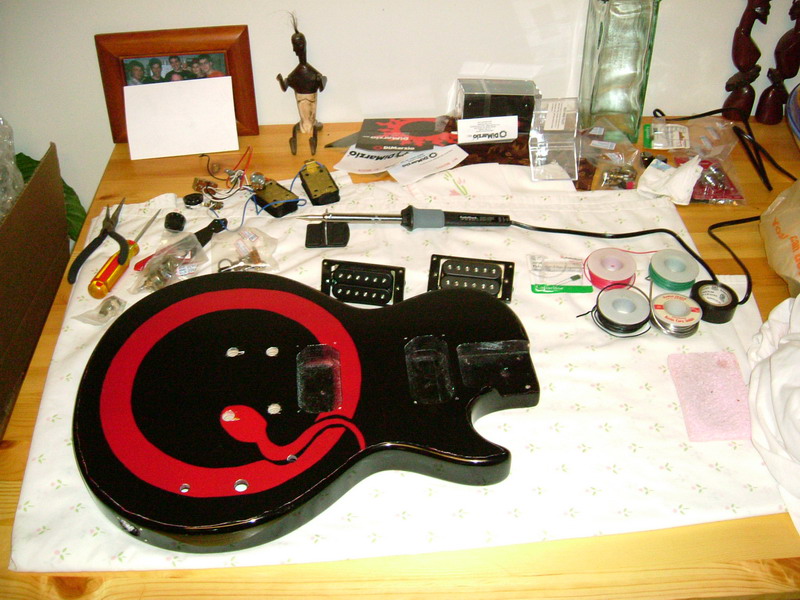
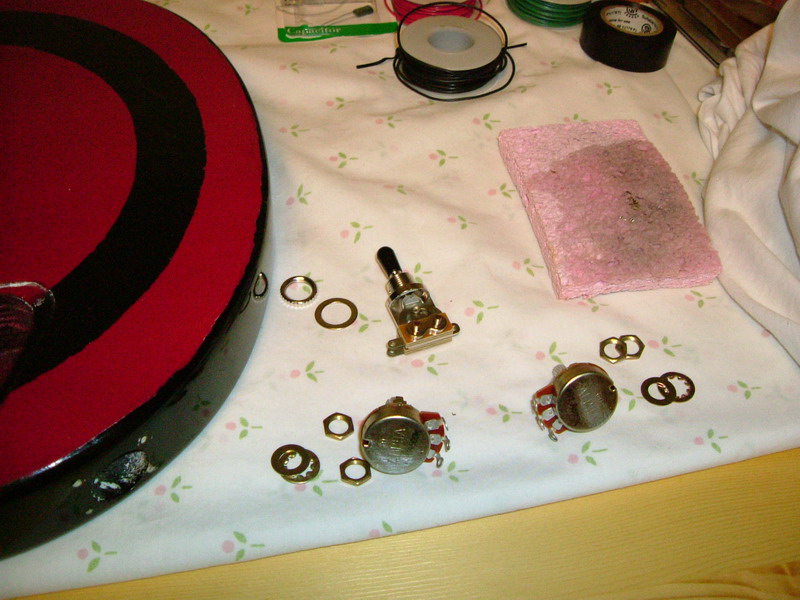

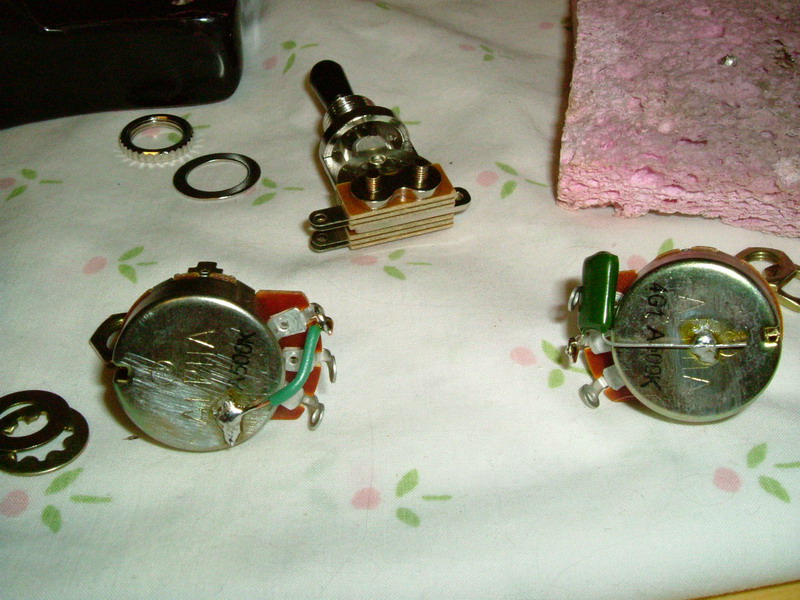
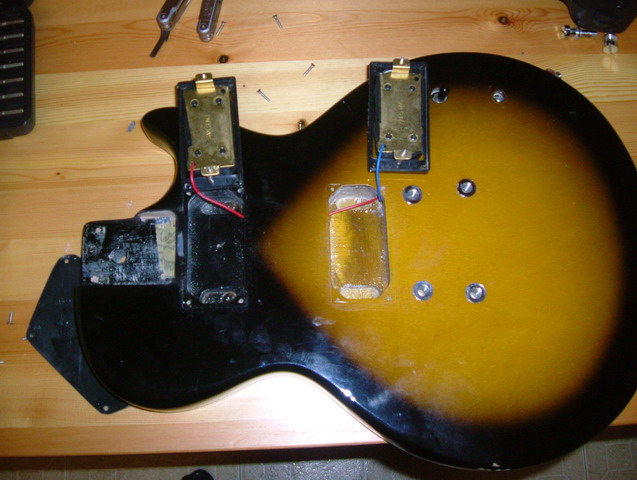
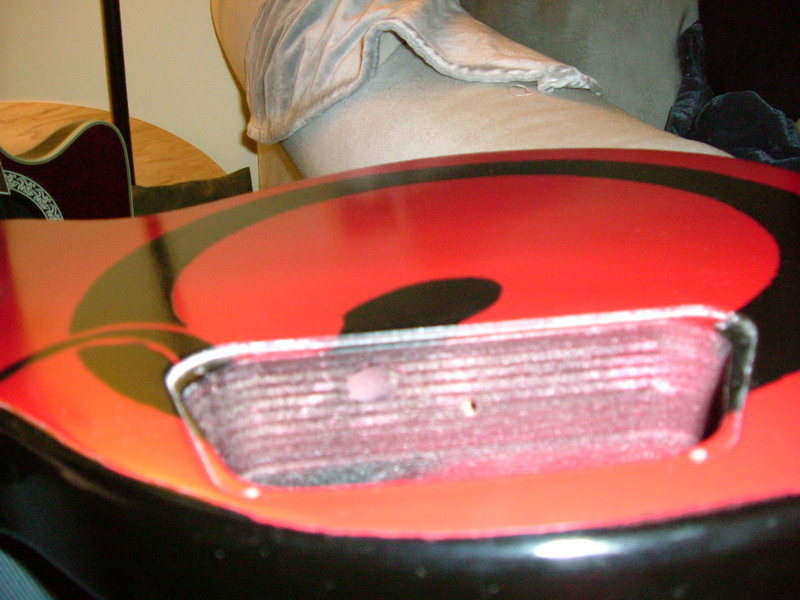
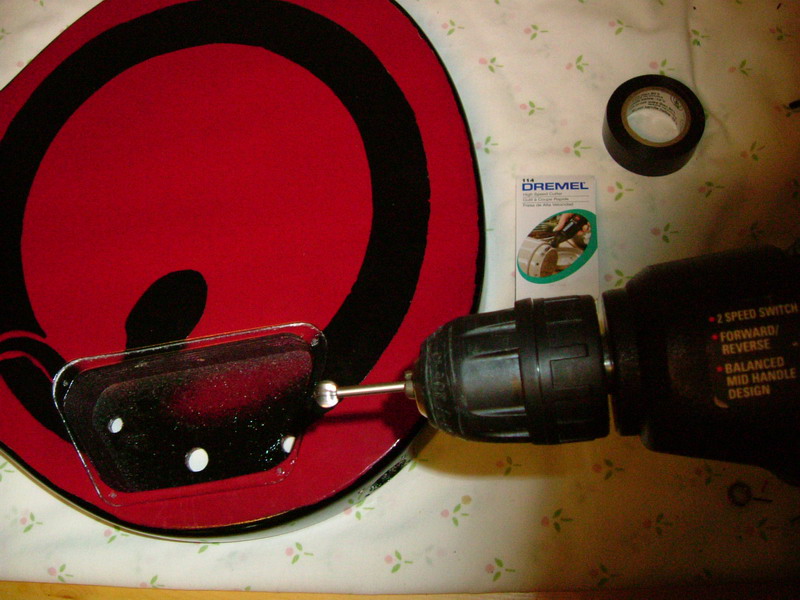
Unfortunately, I discovered that the pots I ordered from stewmac are quite a bit wider than the cheapo Epiphone pots and don't quite fit in the control cavity. A trip to the hardware store was required, as I don't own a chisel or a Dremel.
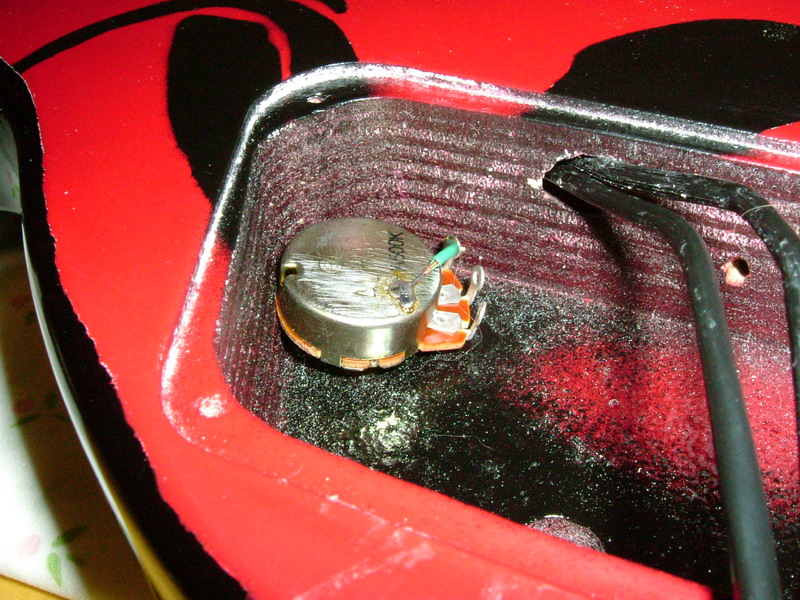

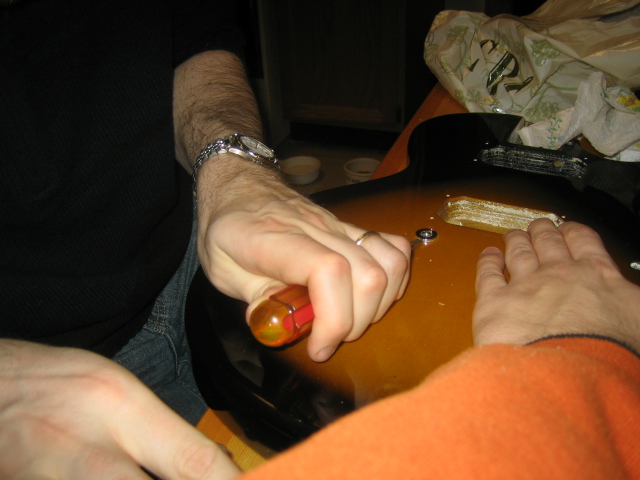
At the hardware store, I was considering buying a Dremel rotary tool when I thought to myself that I could just get a cutting bit and use it in my cordless screwdriver. This turned out pretty well, though having to hold the button down while controlling the routing was less convenient than it would have been with a propper tool. In any event, it got the job done.


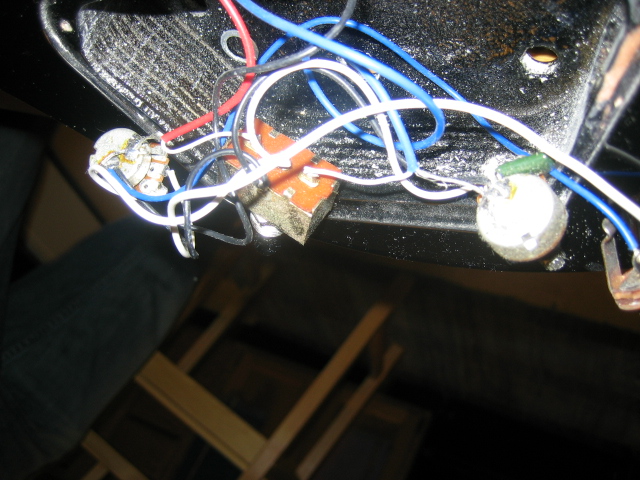
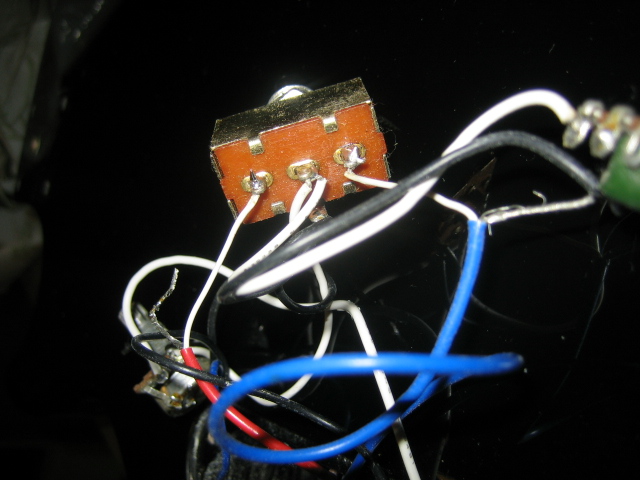
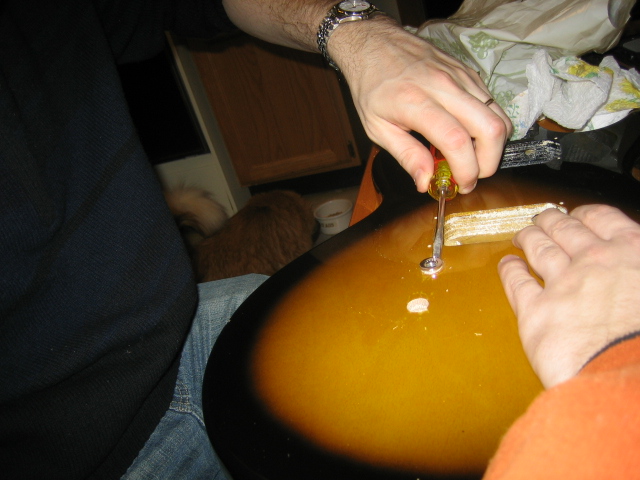
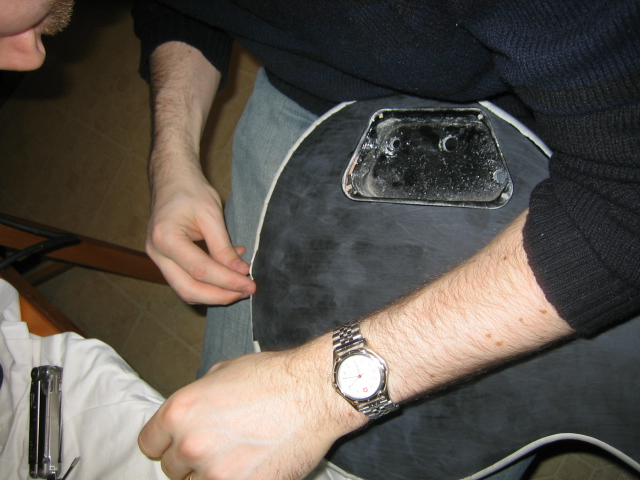
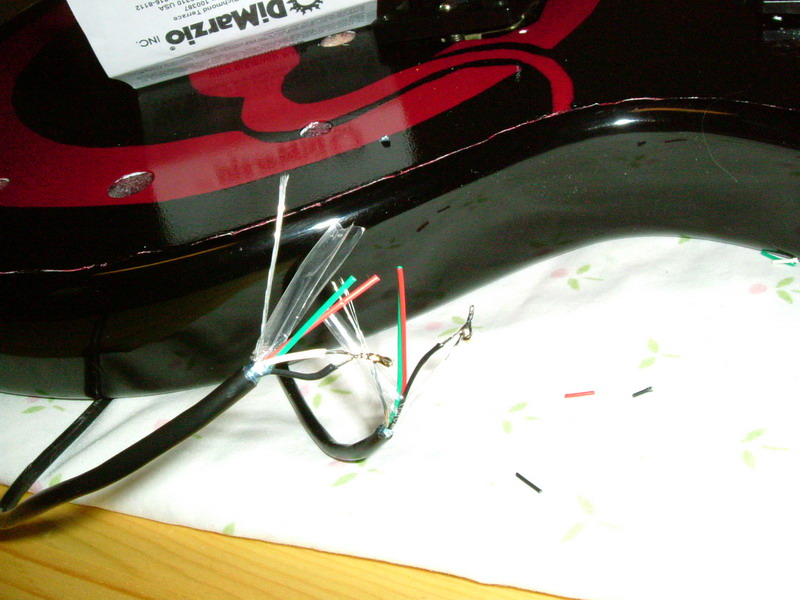
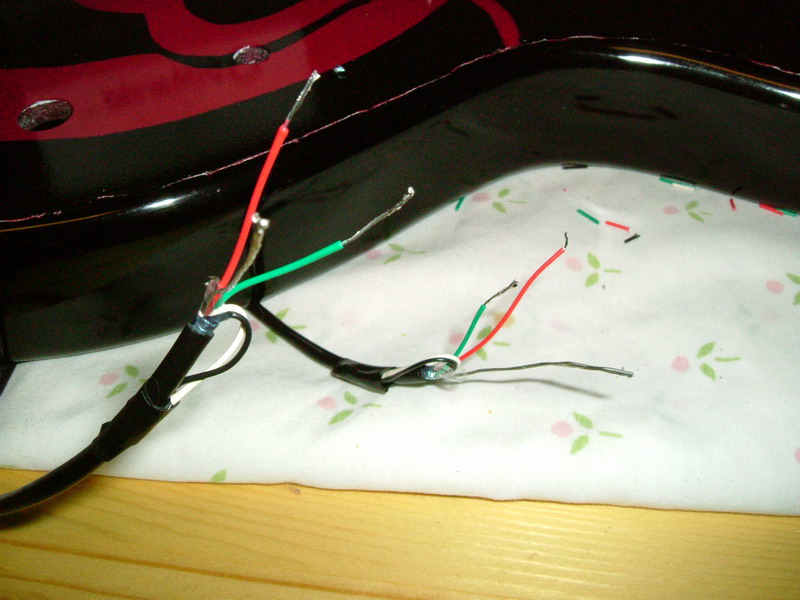
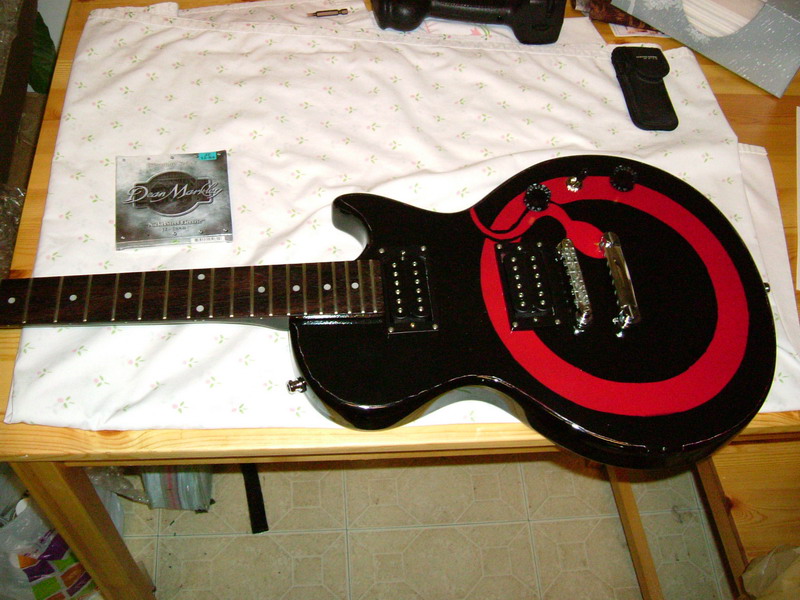
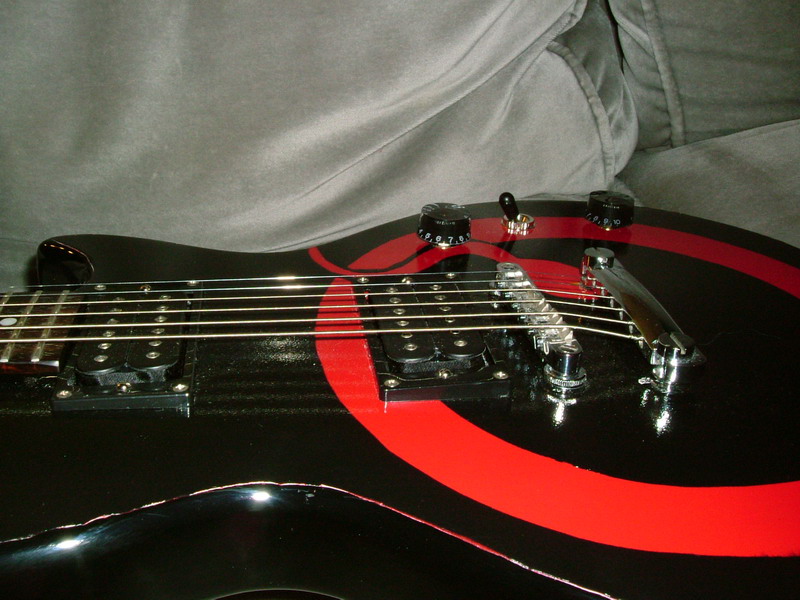
Now with the pots in place, I was ready to resume wiring. This might be a good time to explain that I have a less than favorable history when it comes to wiring and soldering projects. Many years ago, Aaron (from the Minibosses) and I tried making effects pedals. Let's just say that our efforts failed ...twice. And of course, I already said that I tried to rewire the old controls and failed. So my hopes were not high, but the thing wasn't going to wire itself. So given all that, I was very careful and meticulous with the wiring. Apparently that paid off, as when I plugged it in and tapped the pole pieces with a screw driver, they all worked the way they were supposed to. Also, though it's not pictured, the stewmac jack was a litter wider than the Epiphone one, and I had to widen the jack plate slightly with the Dremel bit.
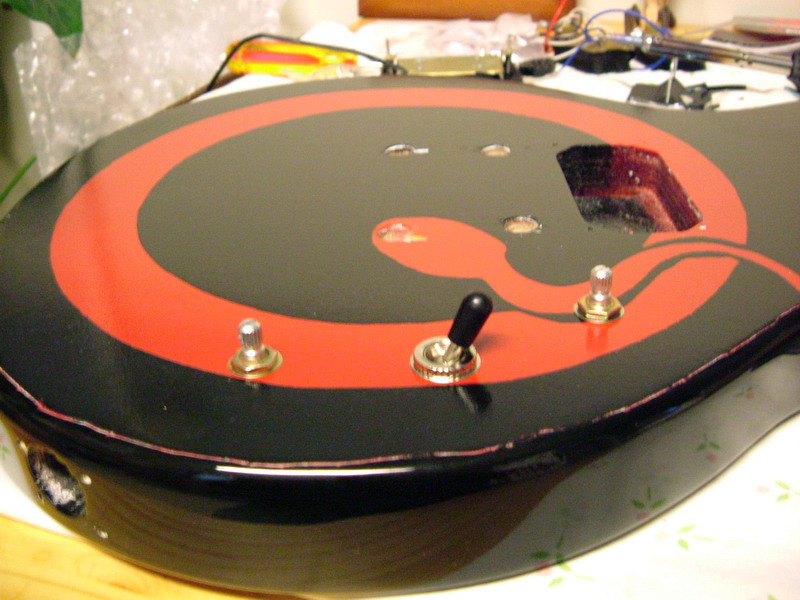


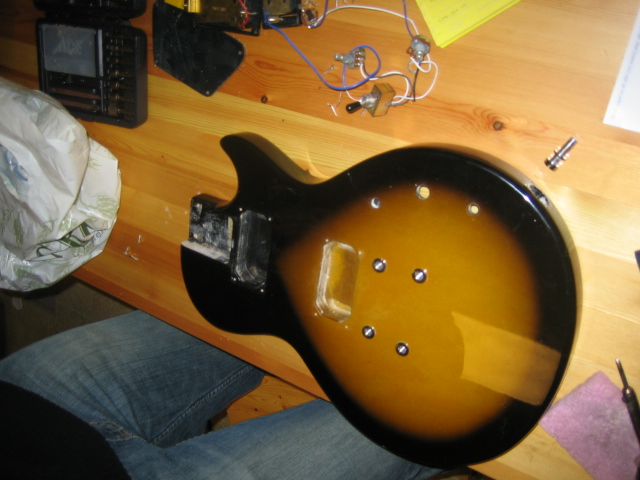
With the wiring working, I was ready to finish assembling the guitar.

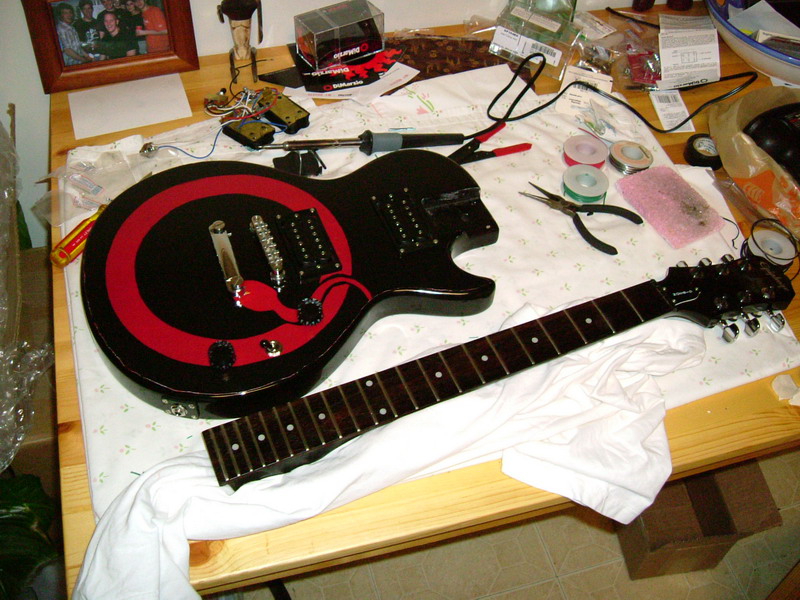
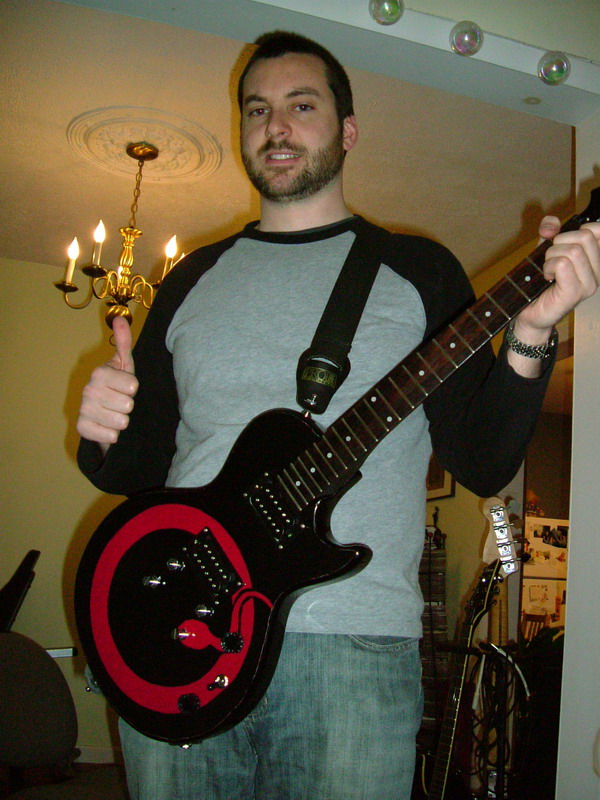


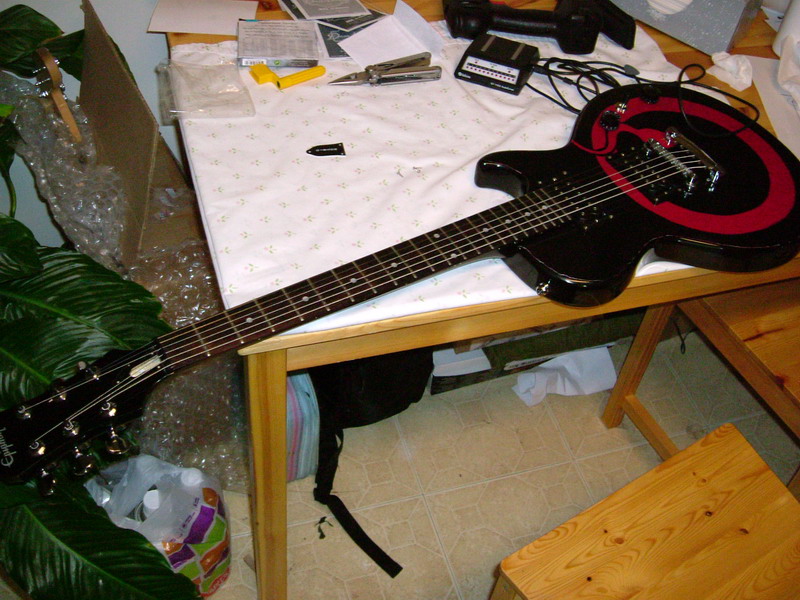
On Sunday I got to string it up and play it for the first time. After over 4 months of working on this thing, it was very rewarding to actually play it. Without even adjusting the settings on my amp, the neck pickup sounds just like the tone on Welcome to Sky Valley. The birdge pickup is a little thin by comparison, but will probably be better for Queens stuff, as opposed to the super saturated heaviness that is Kyuss.

While playing it, I noticed that the string heights were not very consistent and the 12th fret action was pretty bad, yet the 5 fret was buzzing. The funky string heights were a result of the strings not all sitting correctly in the nut, since these strings are .12's with a wound G. I took the leftover snippings of string and used them to file down the nut. The other problem I somewhat fixed by replacing the shims that had been in the neck prior to my painting. The angle of the neck changed enough that the buzzing mostly went away.
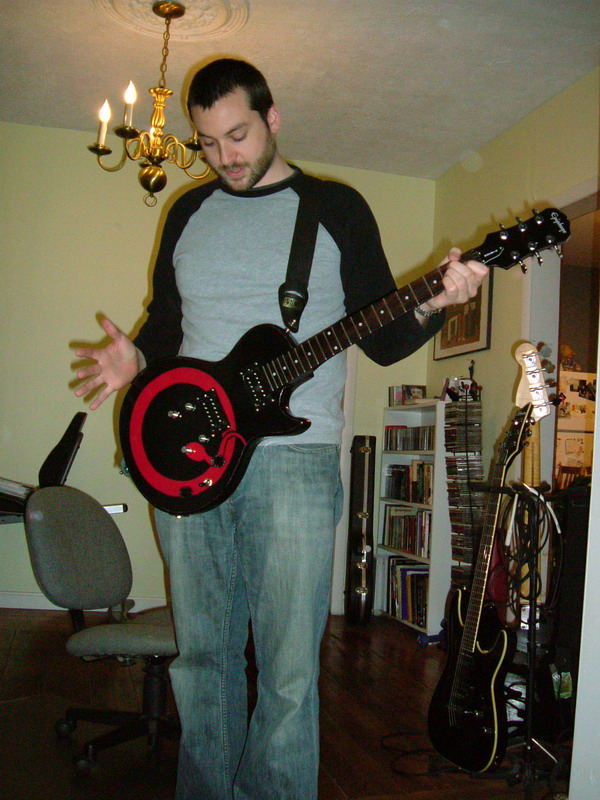
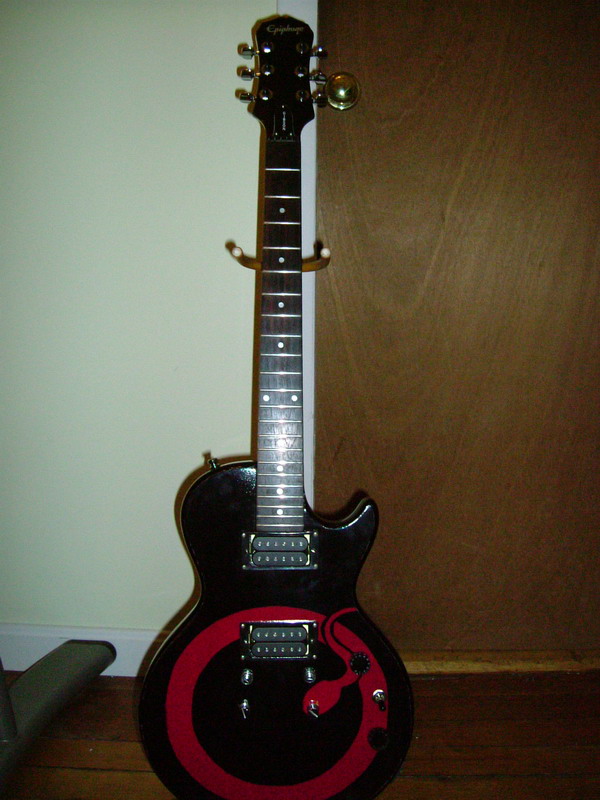
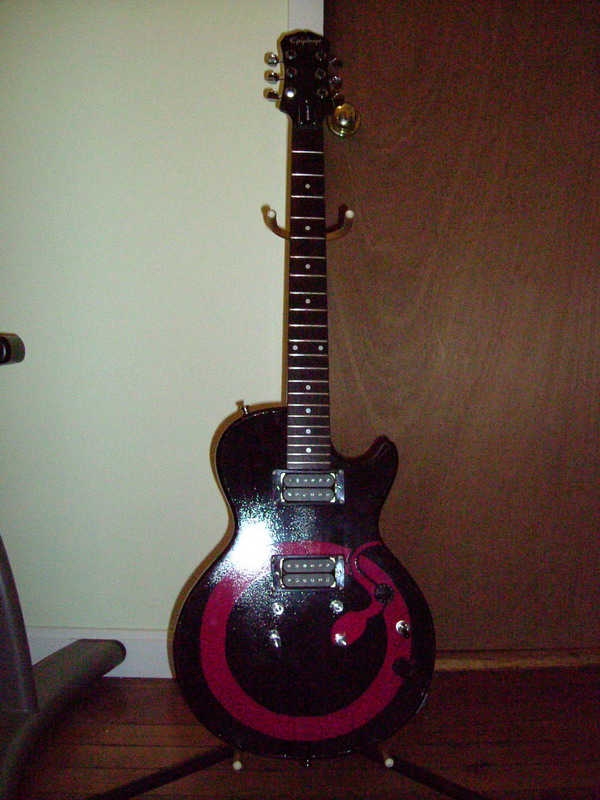
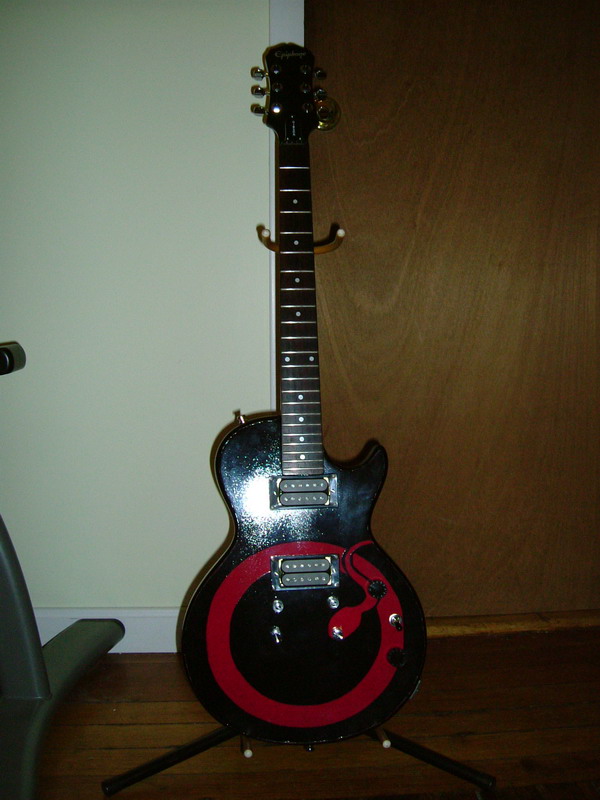
The guitar is now complete!


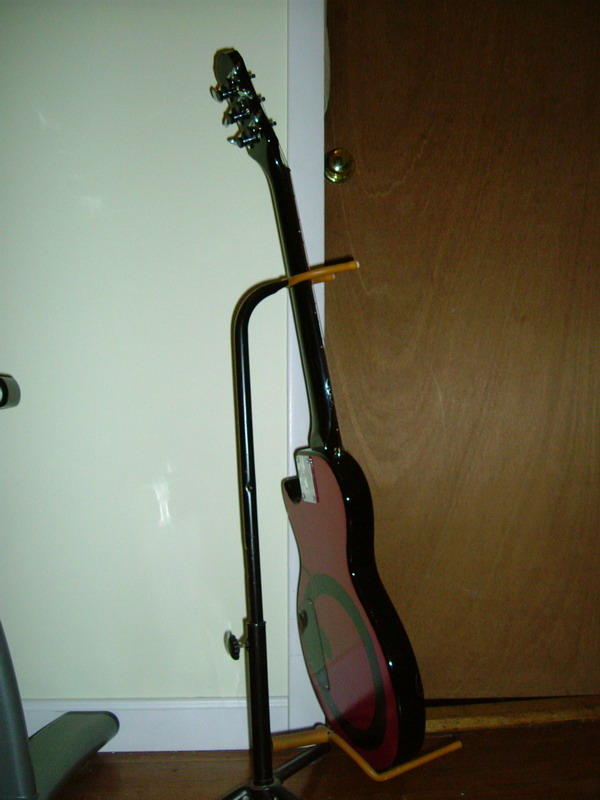


The end? Well, the guitar is complete, and I'm having a blast learning Kyuss riffs in the tuning that the were written and played in. However, there is still room for improvement. The action is still on the high side and I've tightened the truss rod to the point where I have slight buzz around the 4th and 5th frets. I think the laquer added to the neck socket, though slight in thickness, is adding to the high action. I'm considering sanding down the socket, which should help things. The intonation is also running consistently sharp, and on a few of the strings I ran out of space on the saddles to lengthen the strings any further. I think the high action is contributing to the problem, so hopefully the neck fix is a cure all.
So is this the end? For now, yes. However, I do plan on adding to the site as I make adjustments to the guitar. I imagine that as I play it and care for it I will find other things to tinker with. Until then, good bye. It's been a blast doing this and I'm excited about applying what I've learned to the Tele.
I close my eyes, i just can't sleep
Where have you gone again my sweet?
On a long slow goodbye?
On a long slow goodbye...
Goodbye